
Shopify
Connect BabyLoveGrowth to Shopify with a custom app and publish to your store blog on auto-pilot.
The Shopify integration lets BabyLoveGrowth publish articles directly to your Shopify store blog. Once connected, every newly generated article is published automatically — live or as a draft, your choice.
Integration Video
No blogs found? Check these first
If you see "No blogs found. Create a blog in your Shopify store first," confirm that your store has at least one blog set up (e.g. Content → Blog posts → Manage blogs → Add blog), that the credentials you provided are valid, and that your app has the correct access permissions ( read_content and write_content). Also ensure the user who created and installed the app has the Owner role for the site — the Collaborator role does not work for this integration.
How to Connect Shopify
Open Settings → Integrations, find Shopify under the CMS tab, and click Connect to launch the setup wizard. The wizard walks you through 7 short steps, mirrored below. We recommend the Client Credentials method (Client ID & Secret) shown here.
Already connected? The Shopify card shows a Connected badge — click Manage to update your blog, author, or publish settings at any time.
What You Needv
Shopify admin access with the Owner role and permission to create apps
Your store name from your
.myshopify.comdomain (e.g.na70yq-bn)At least one Blog in Shopify (create one if none appears in the dropdown)
Step 1: Before you startv
BabyLoveGrowth publishes articles to your Shopify blog automatically. Make sure you have at least one blog set up in your store and that you have the Owner role, then click My blog is set up to continue.
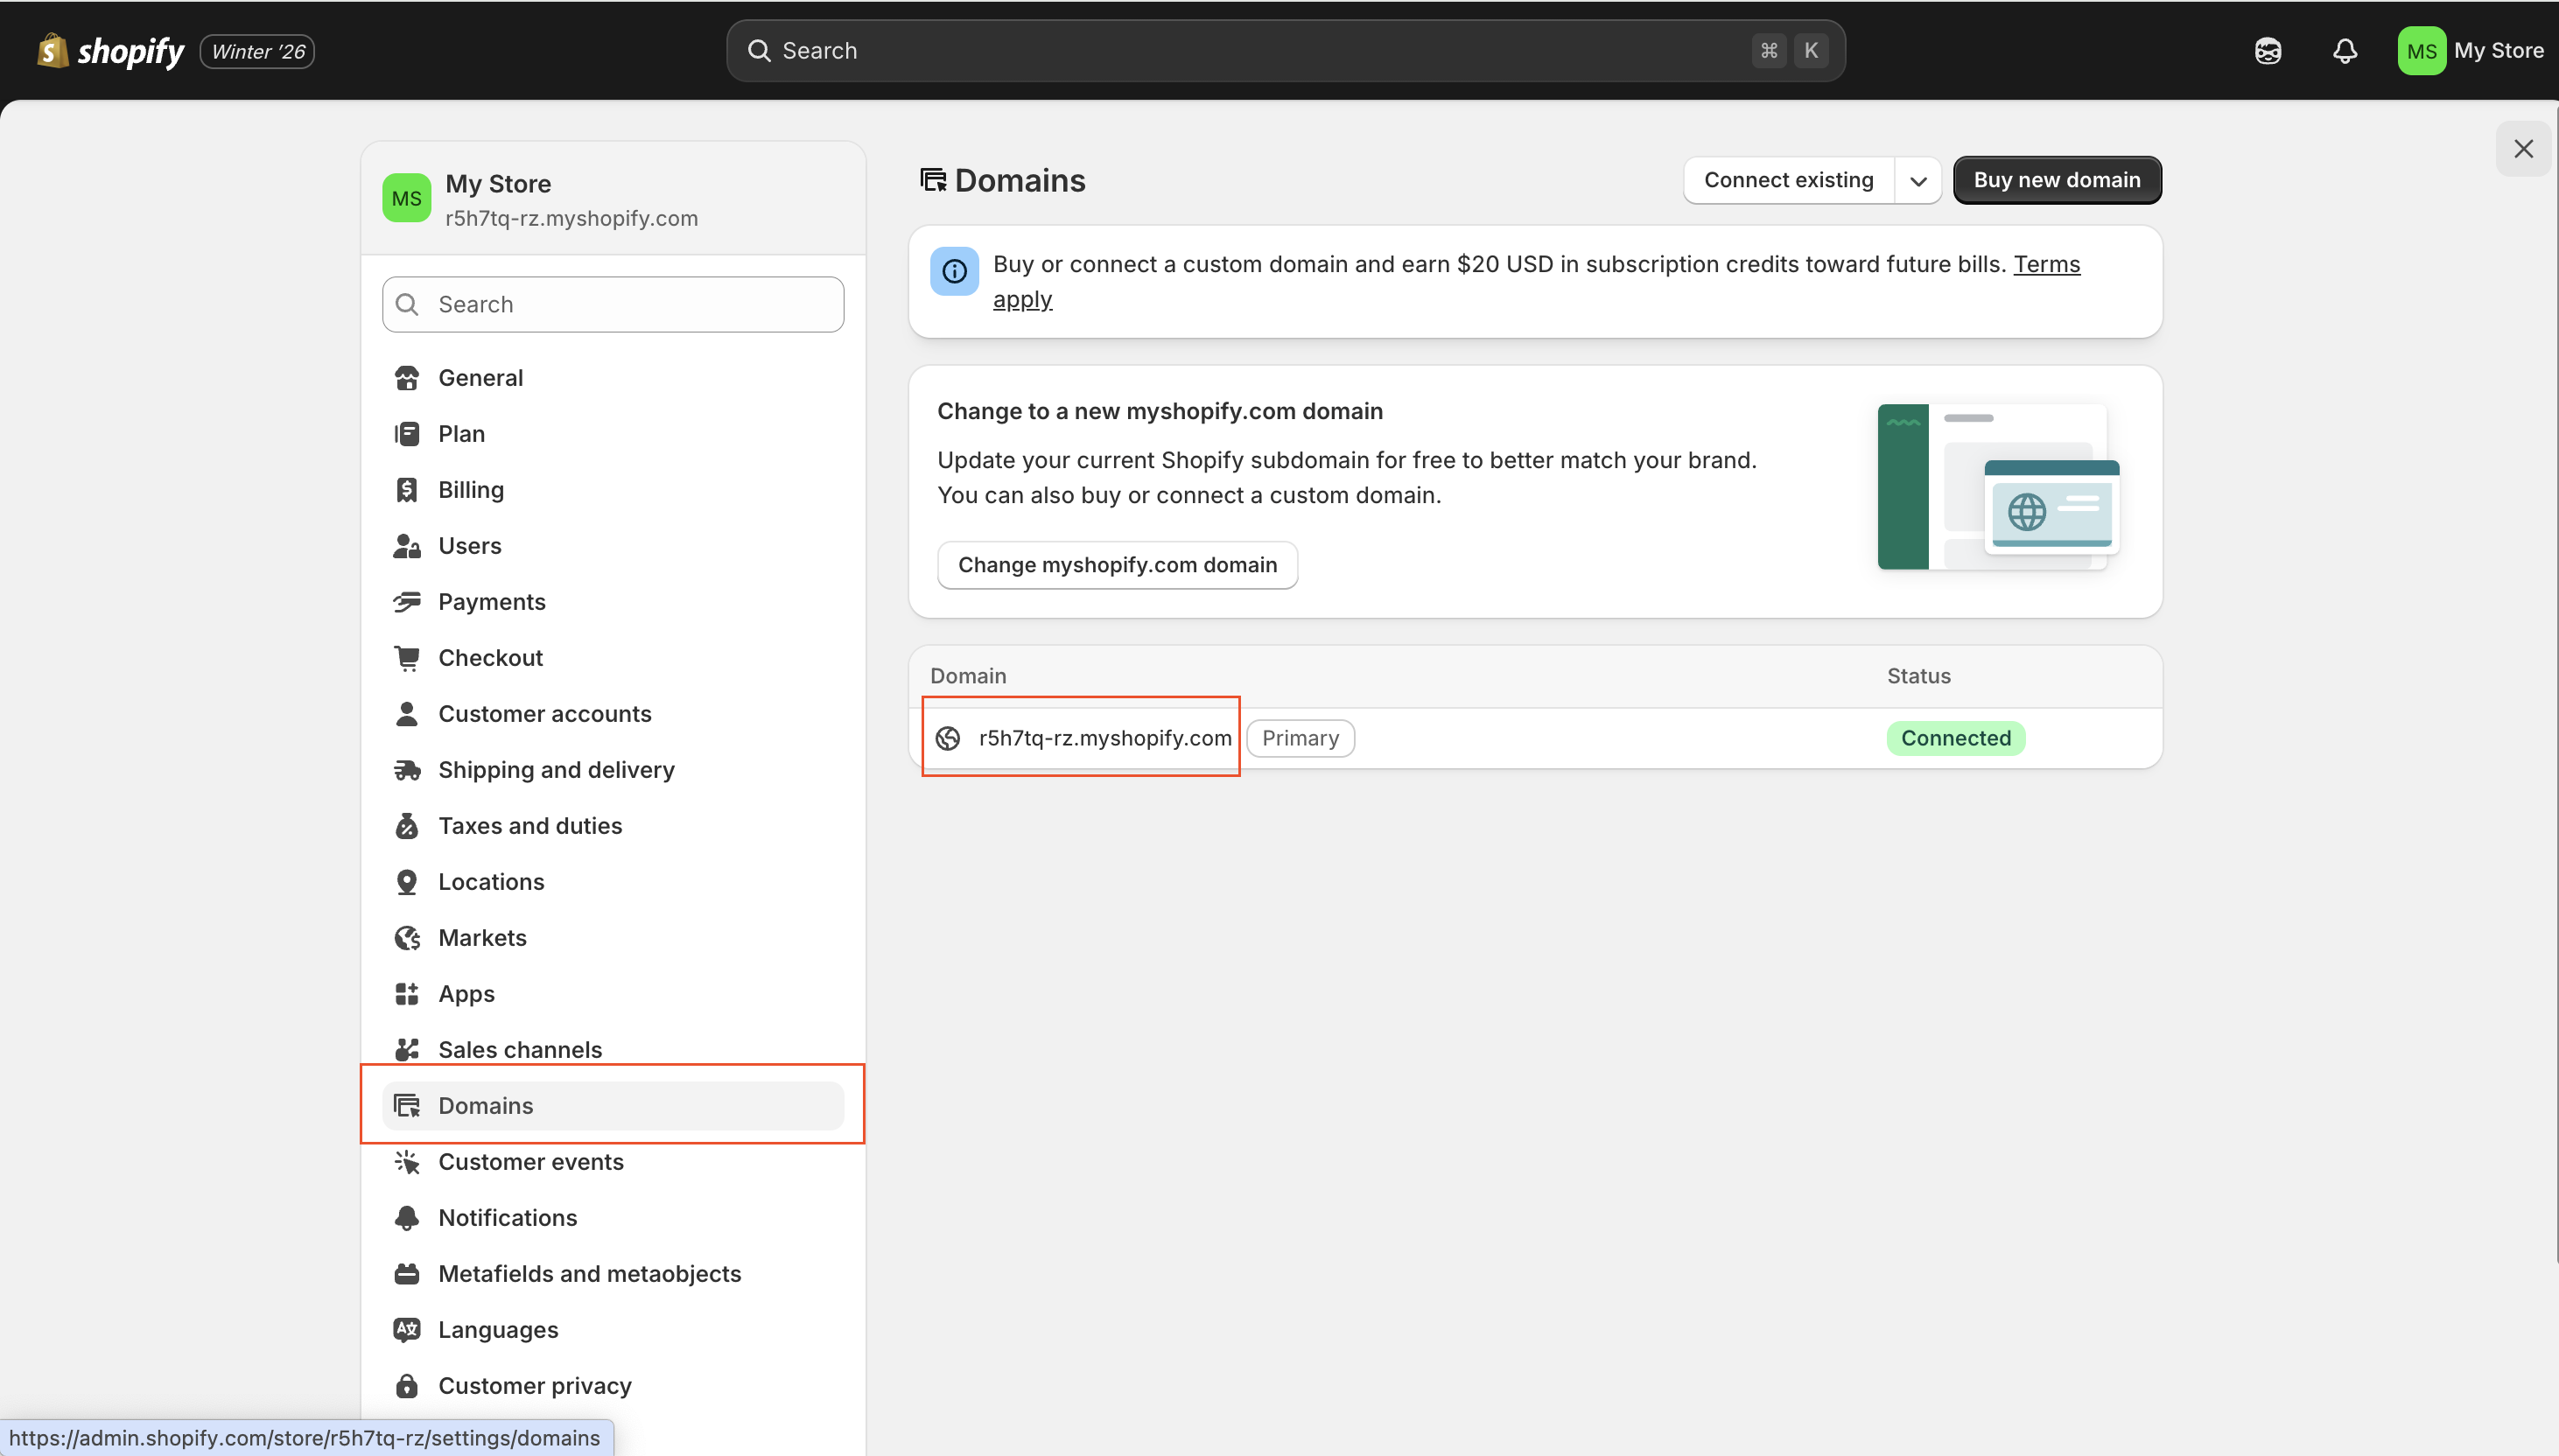
Step 2: Get your store namev
In Shopify Admin, go to Settings → Domains and find your
.myshopify.com URL. Copy the part before .myshopify.com — e.g.
na70yq-bn from na70yq-bn.myshopify.com — and paste it into the
wizard.
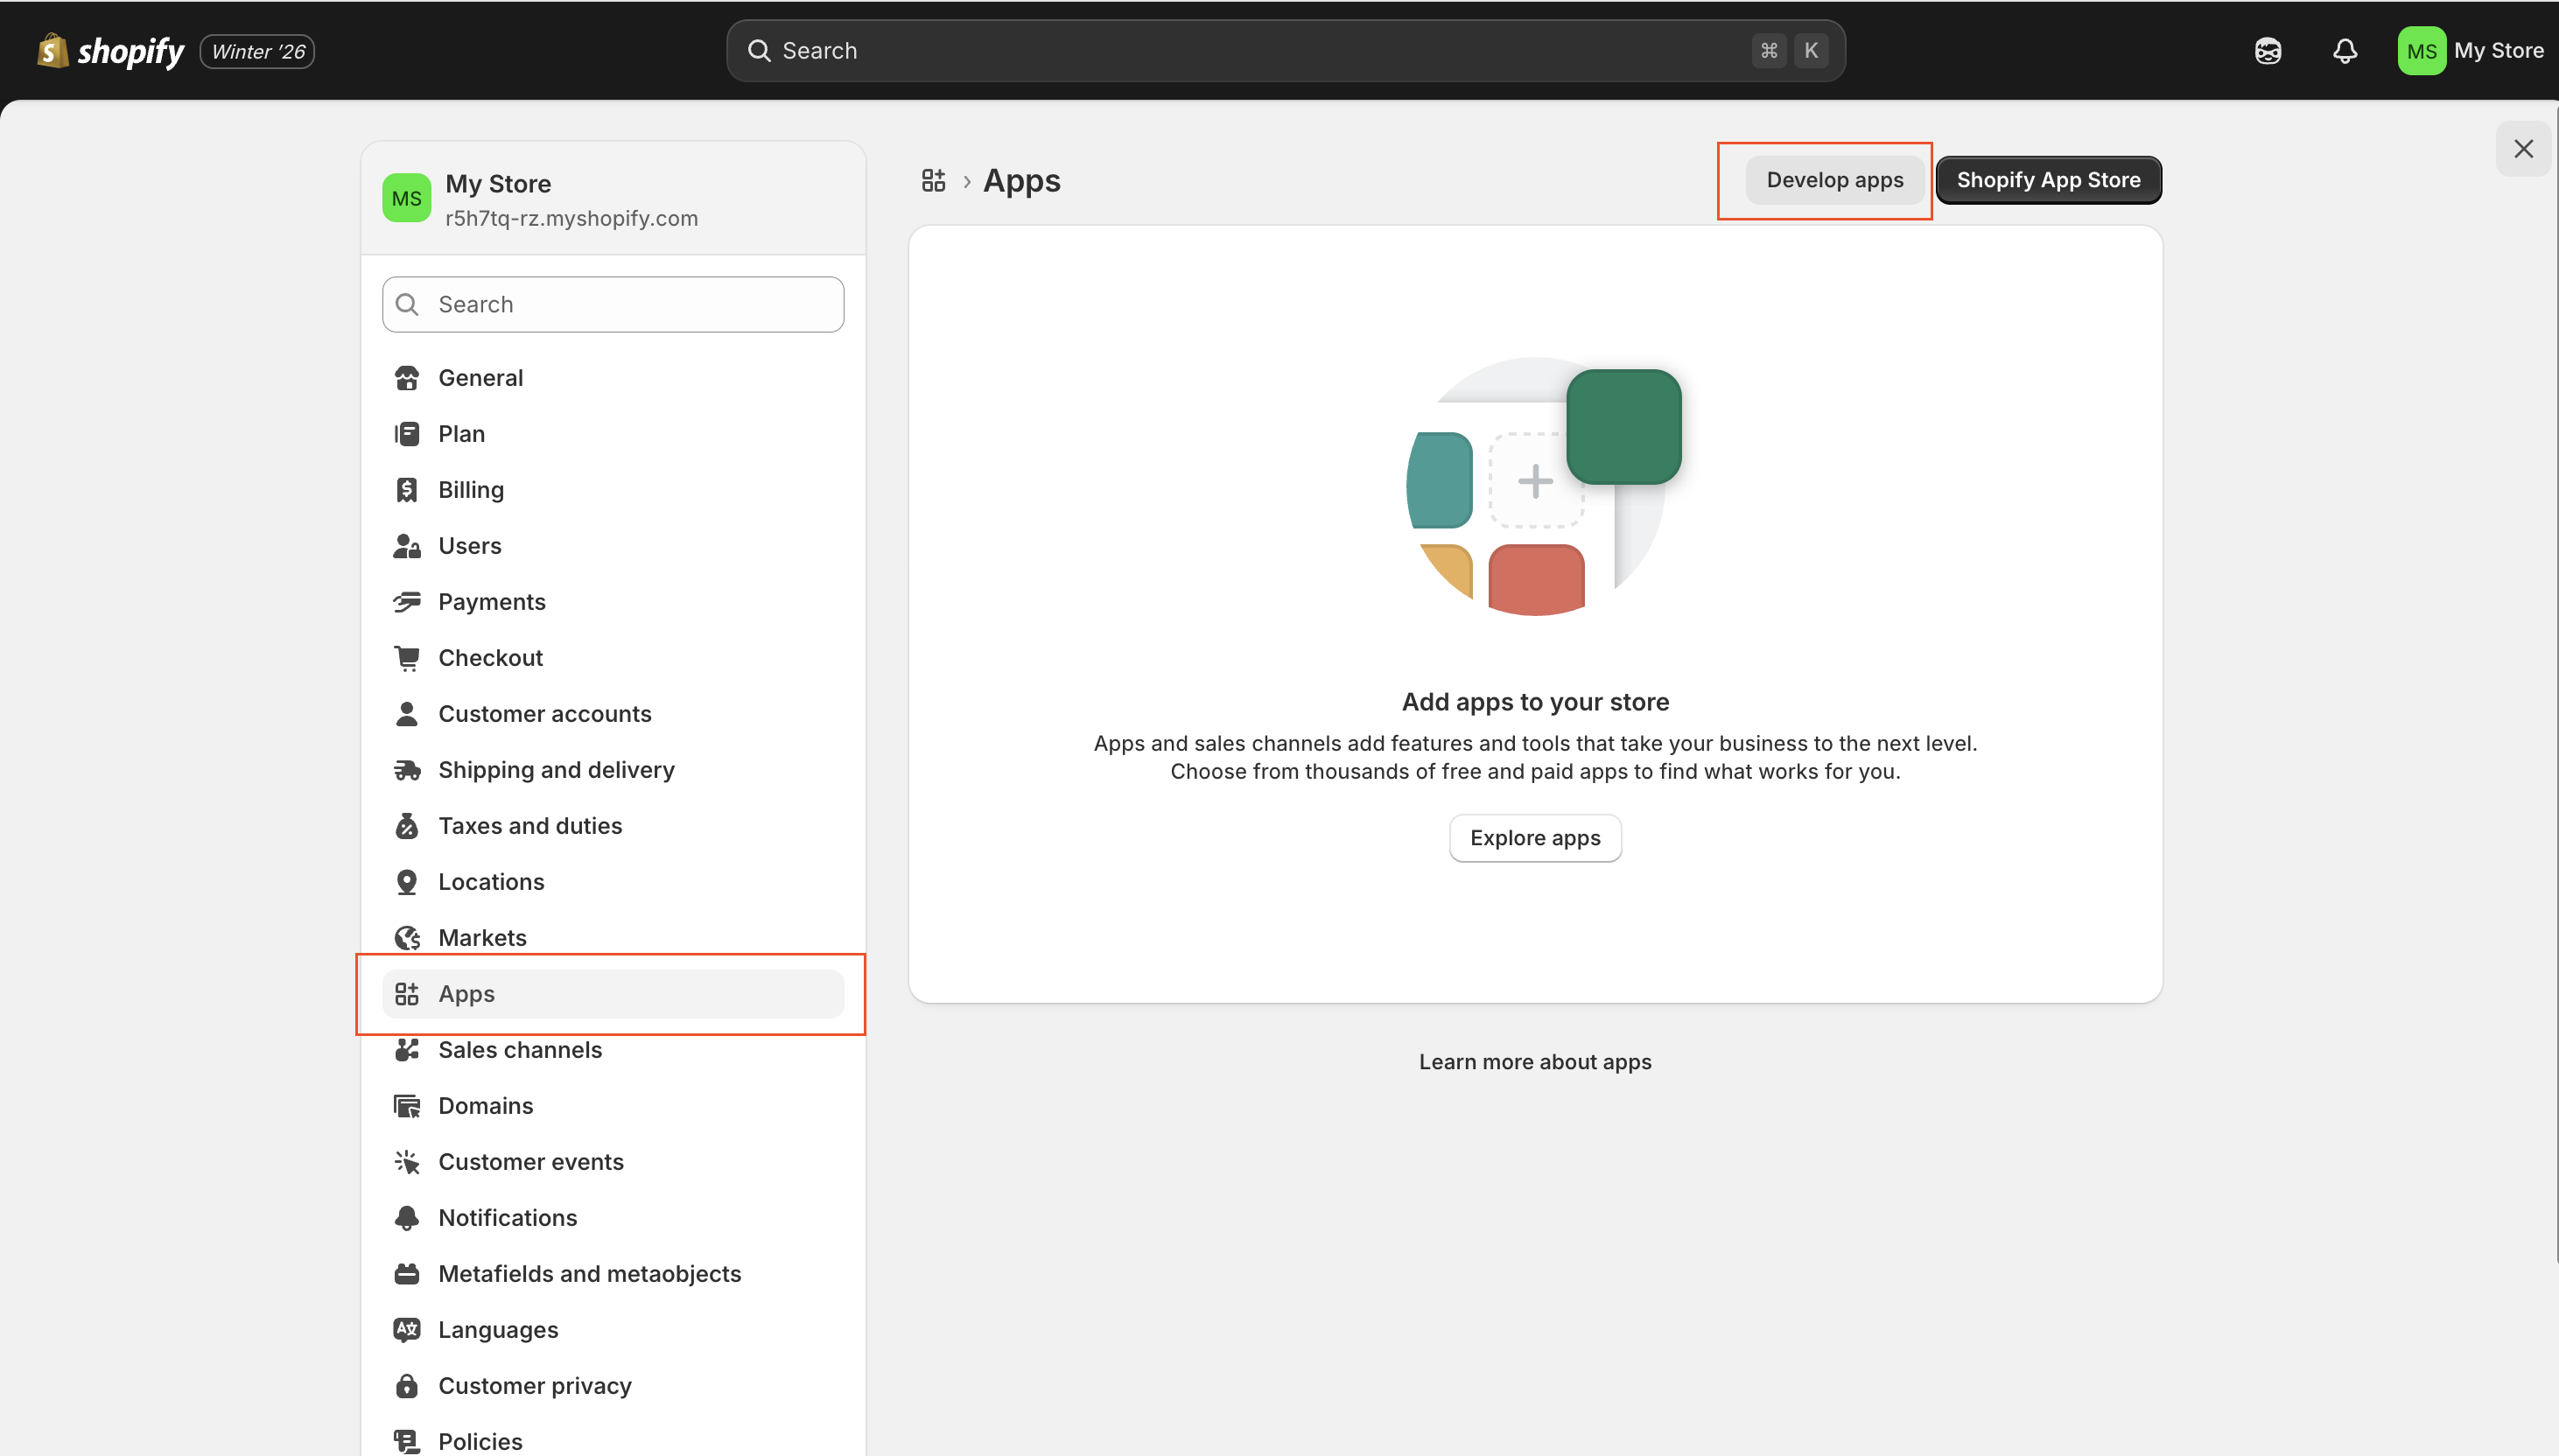
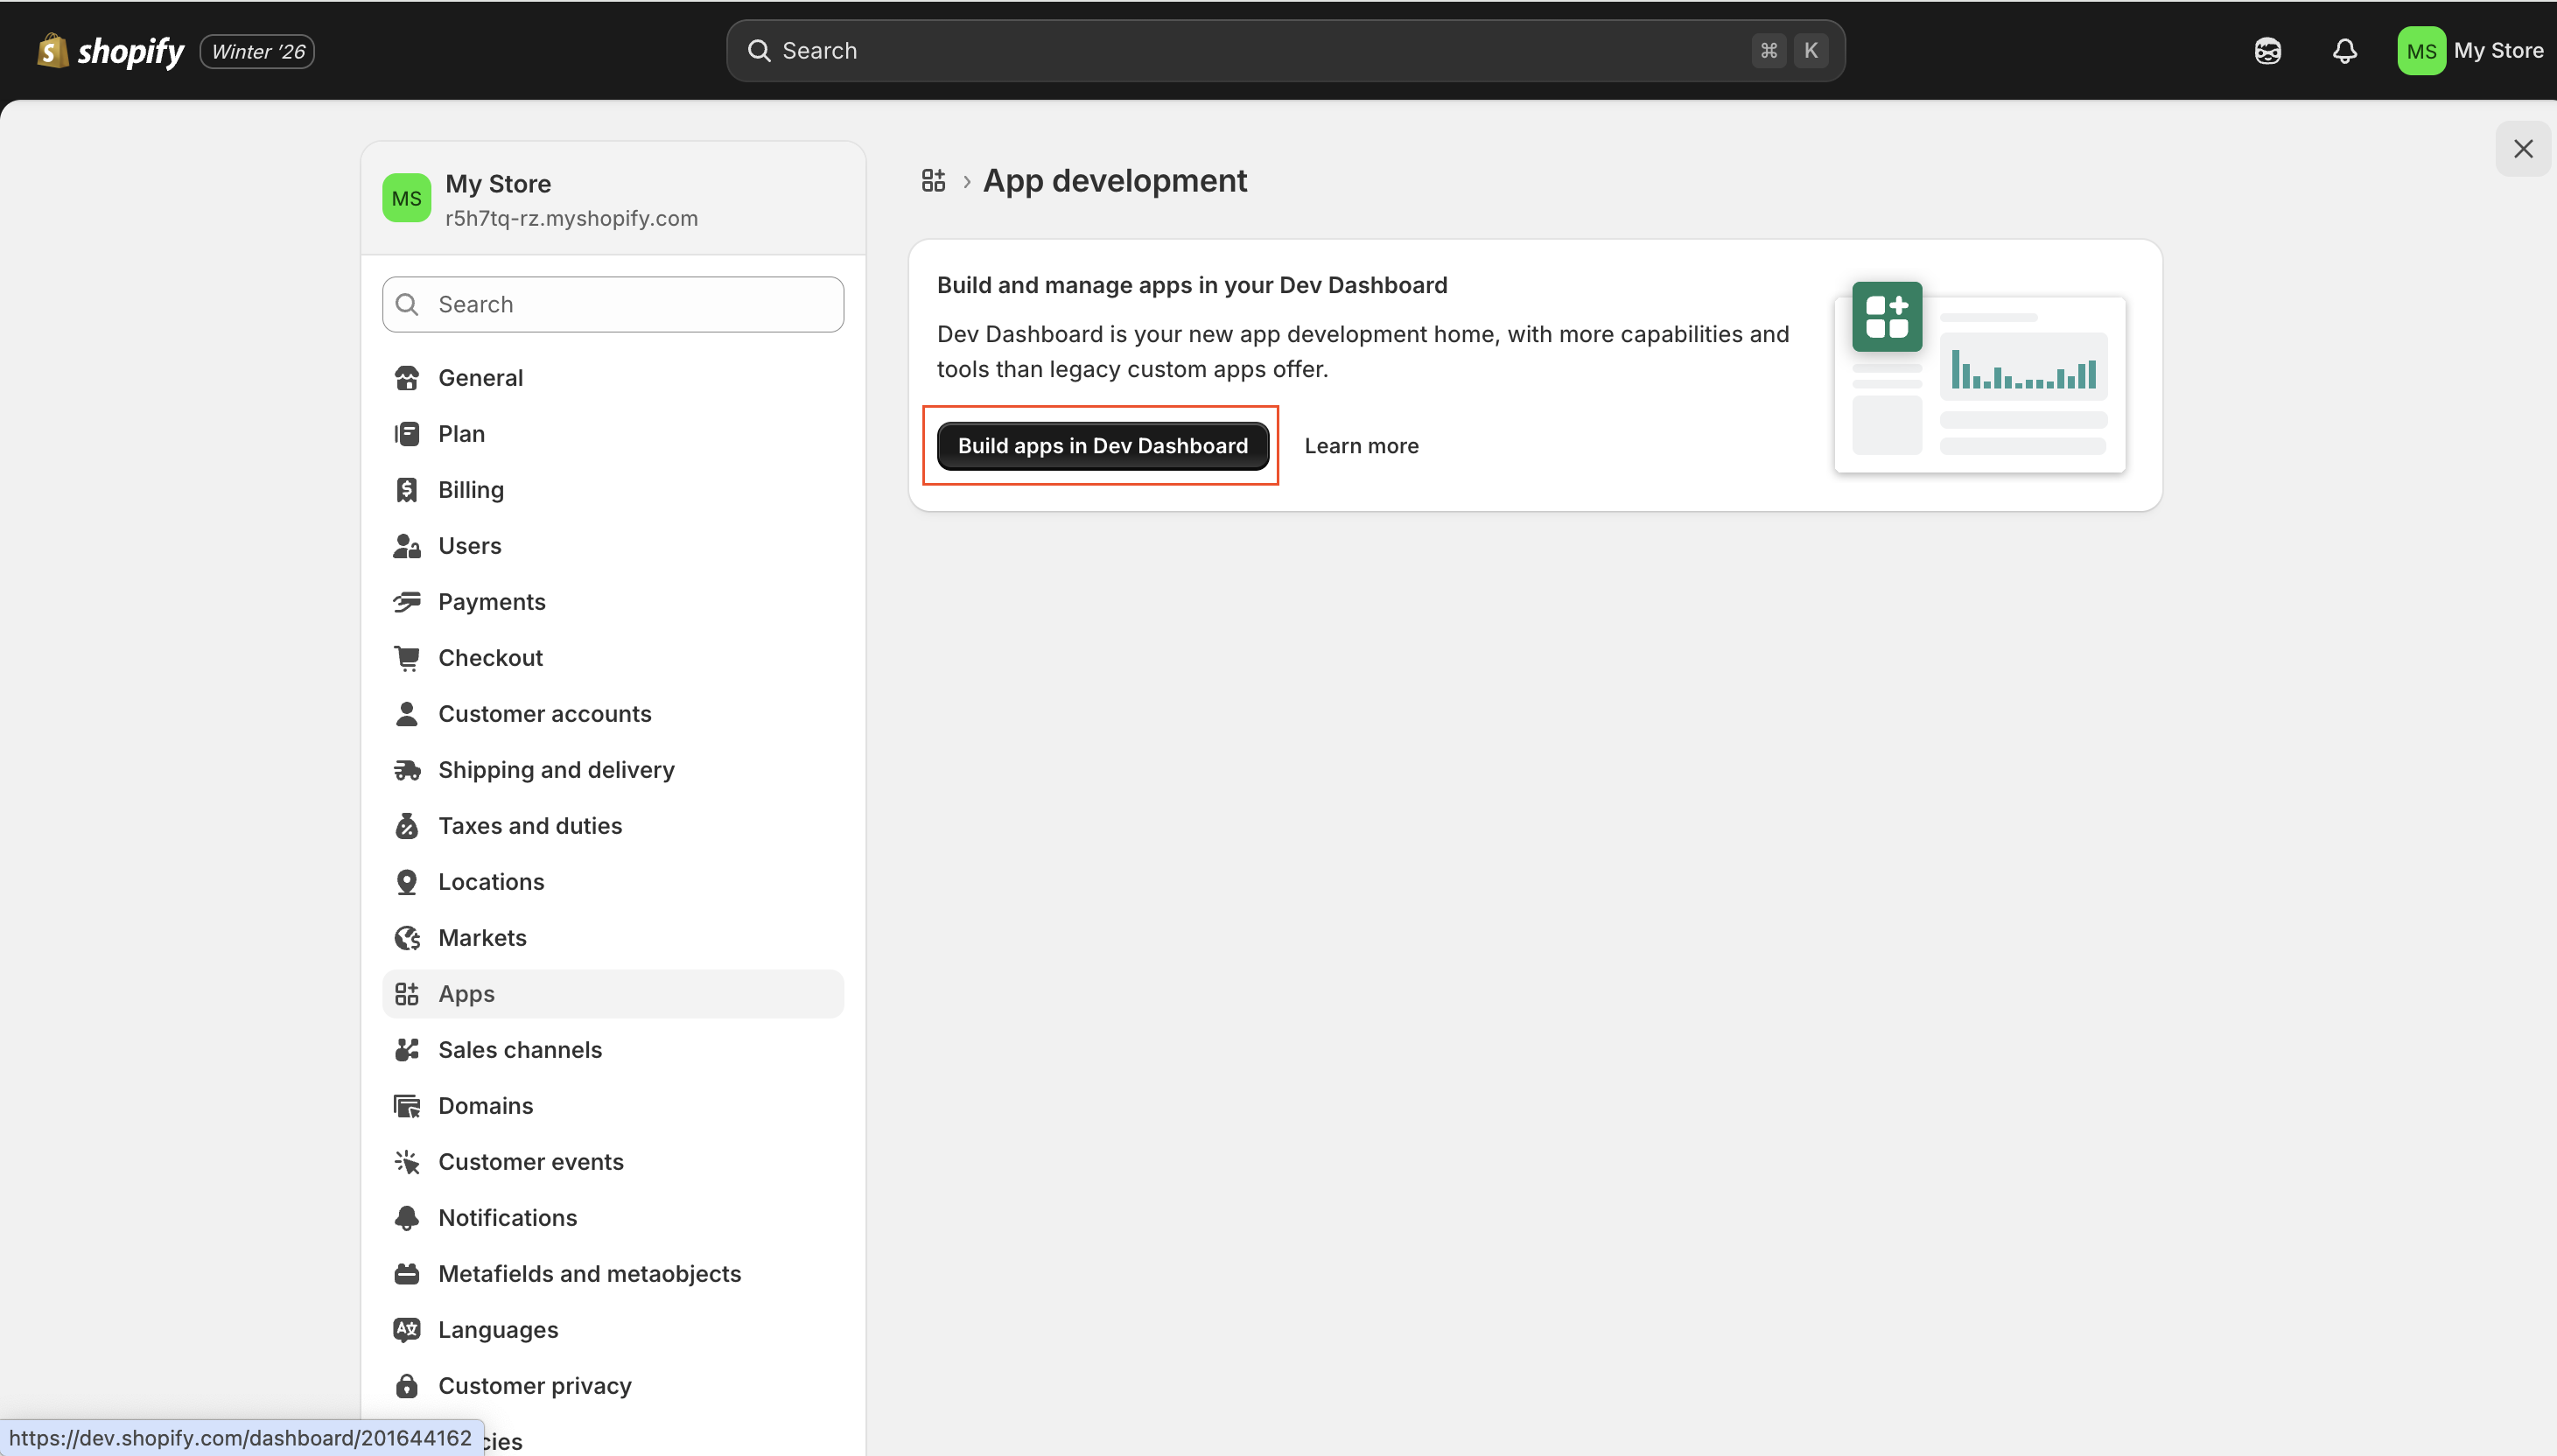
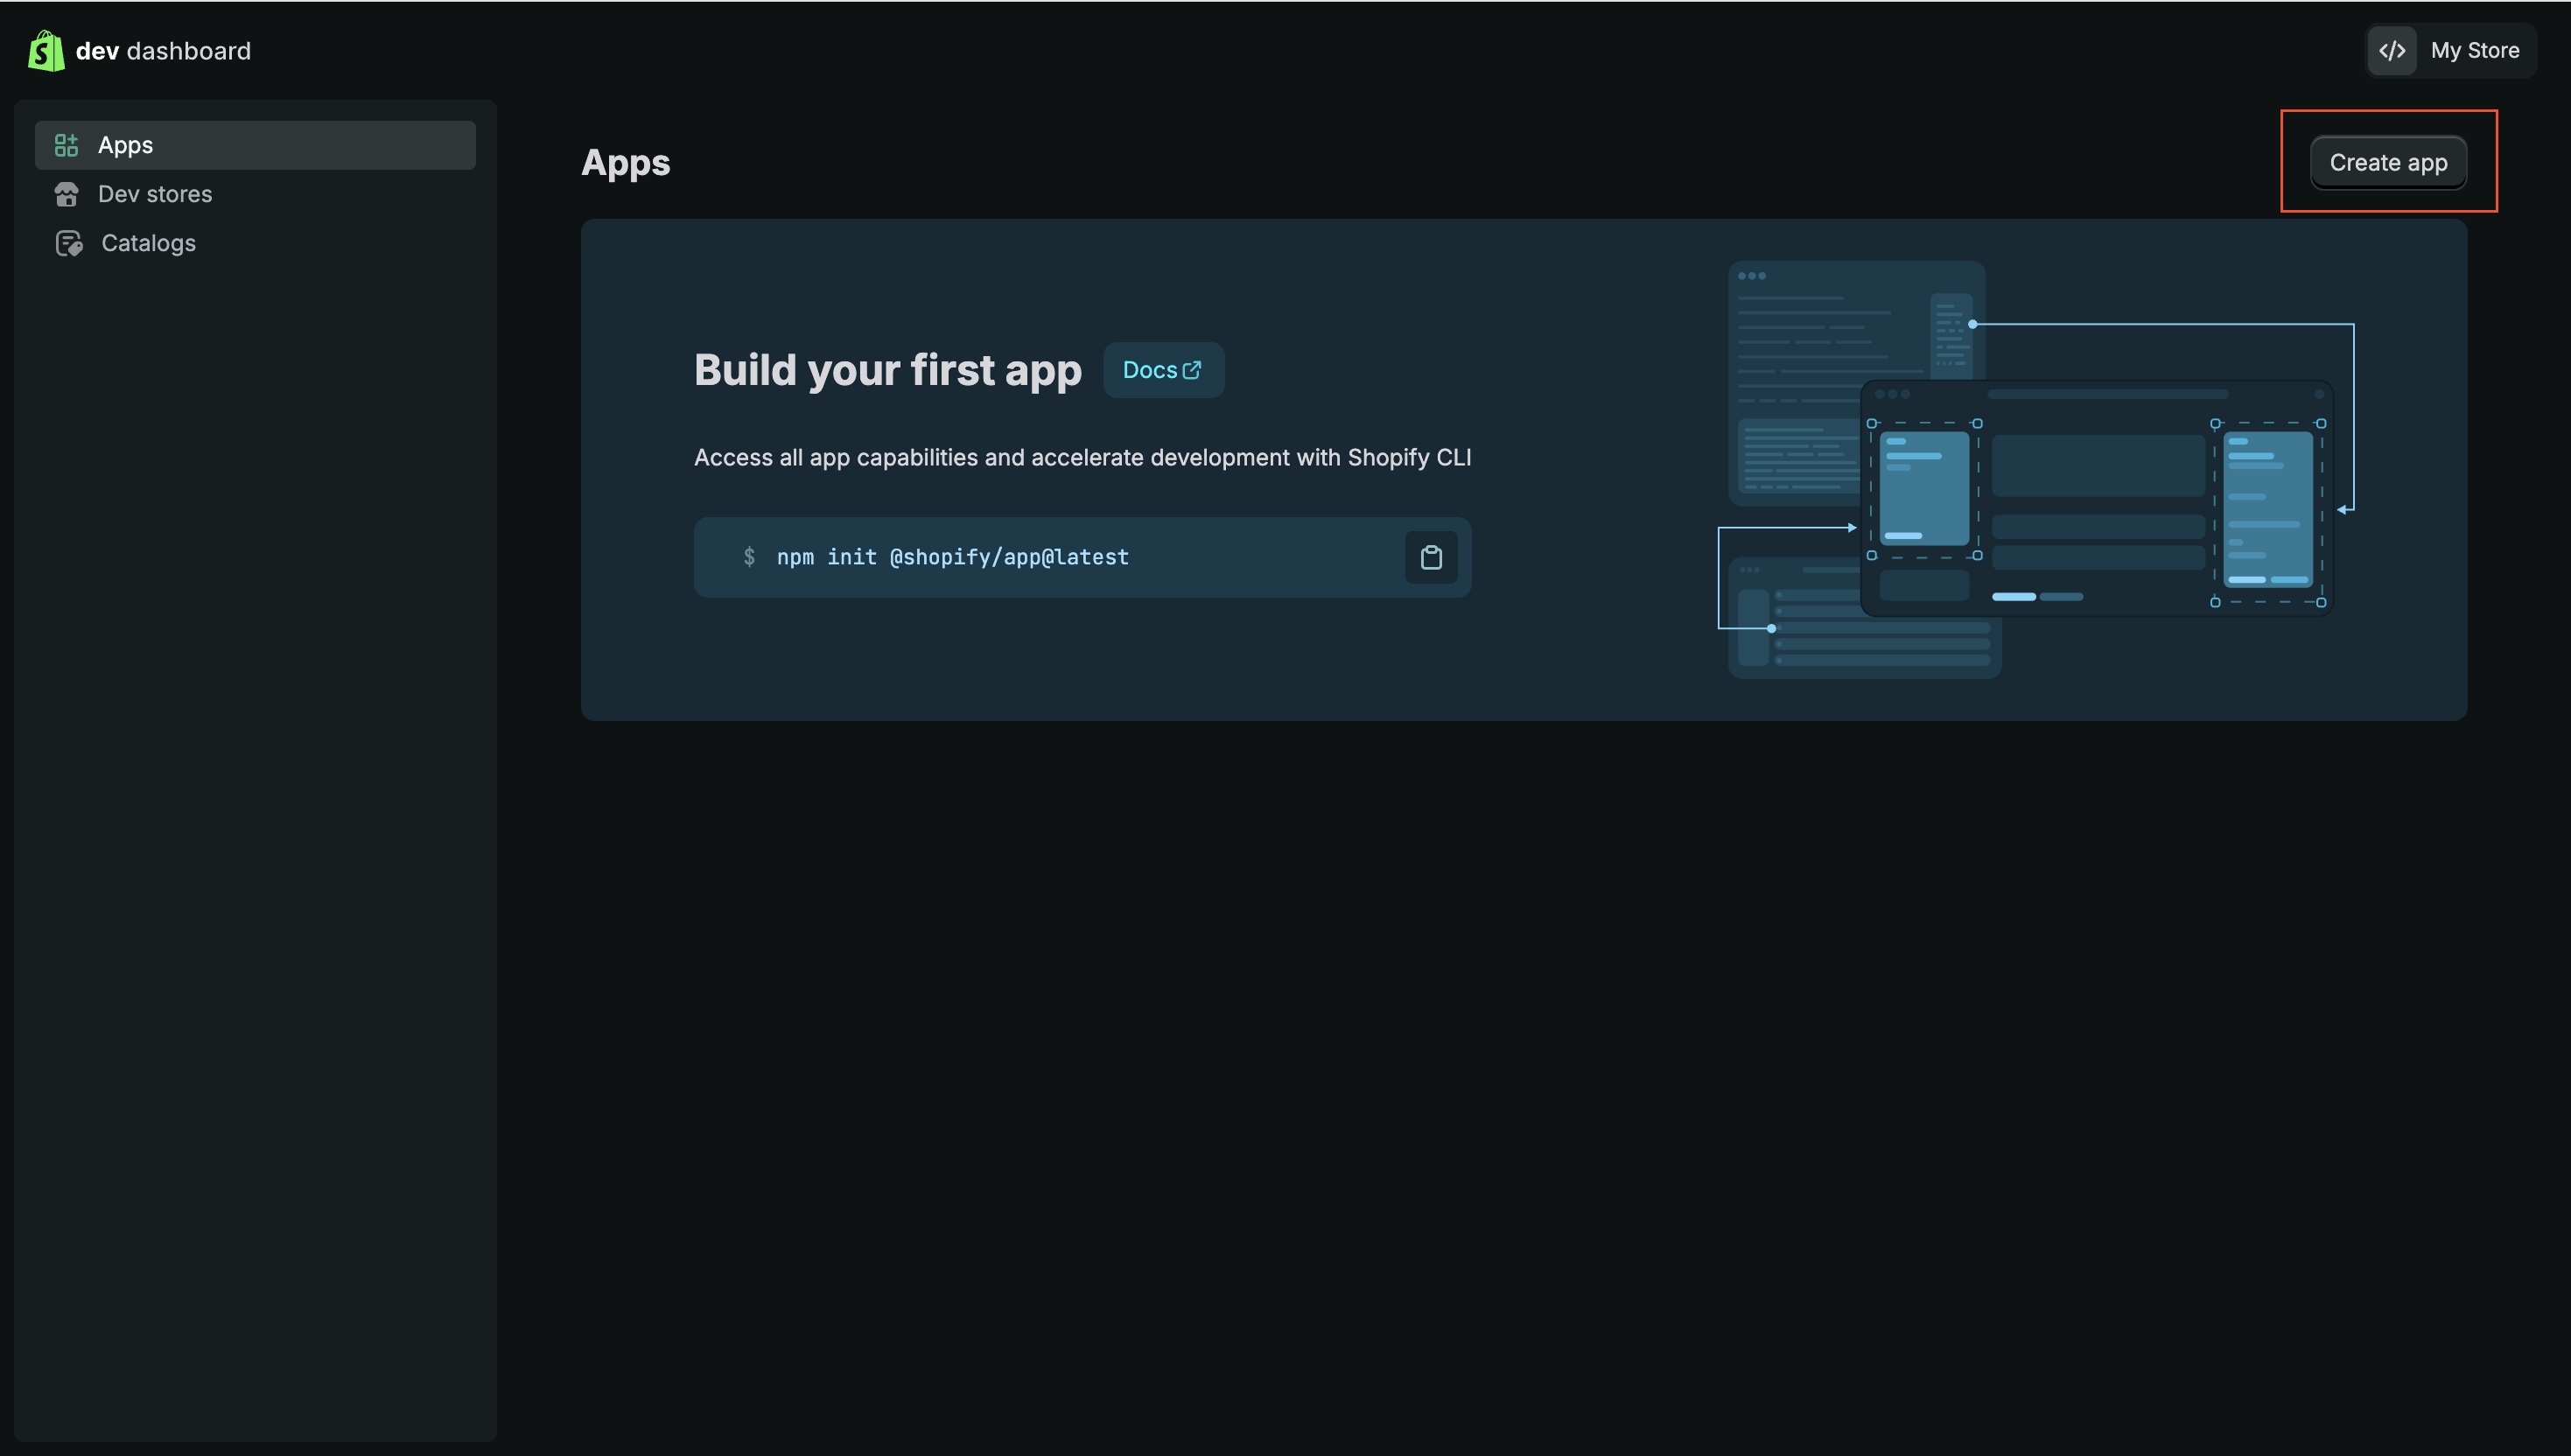
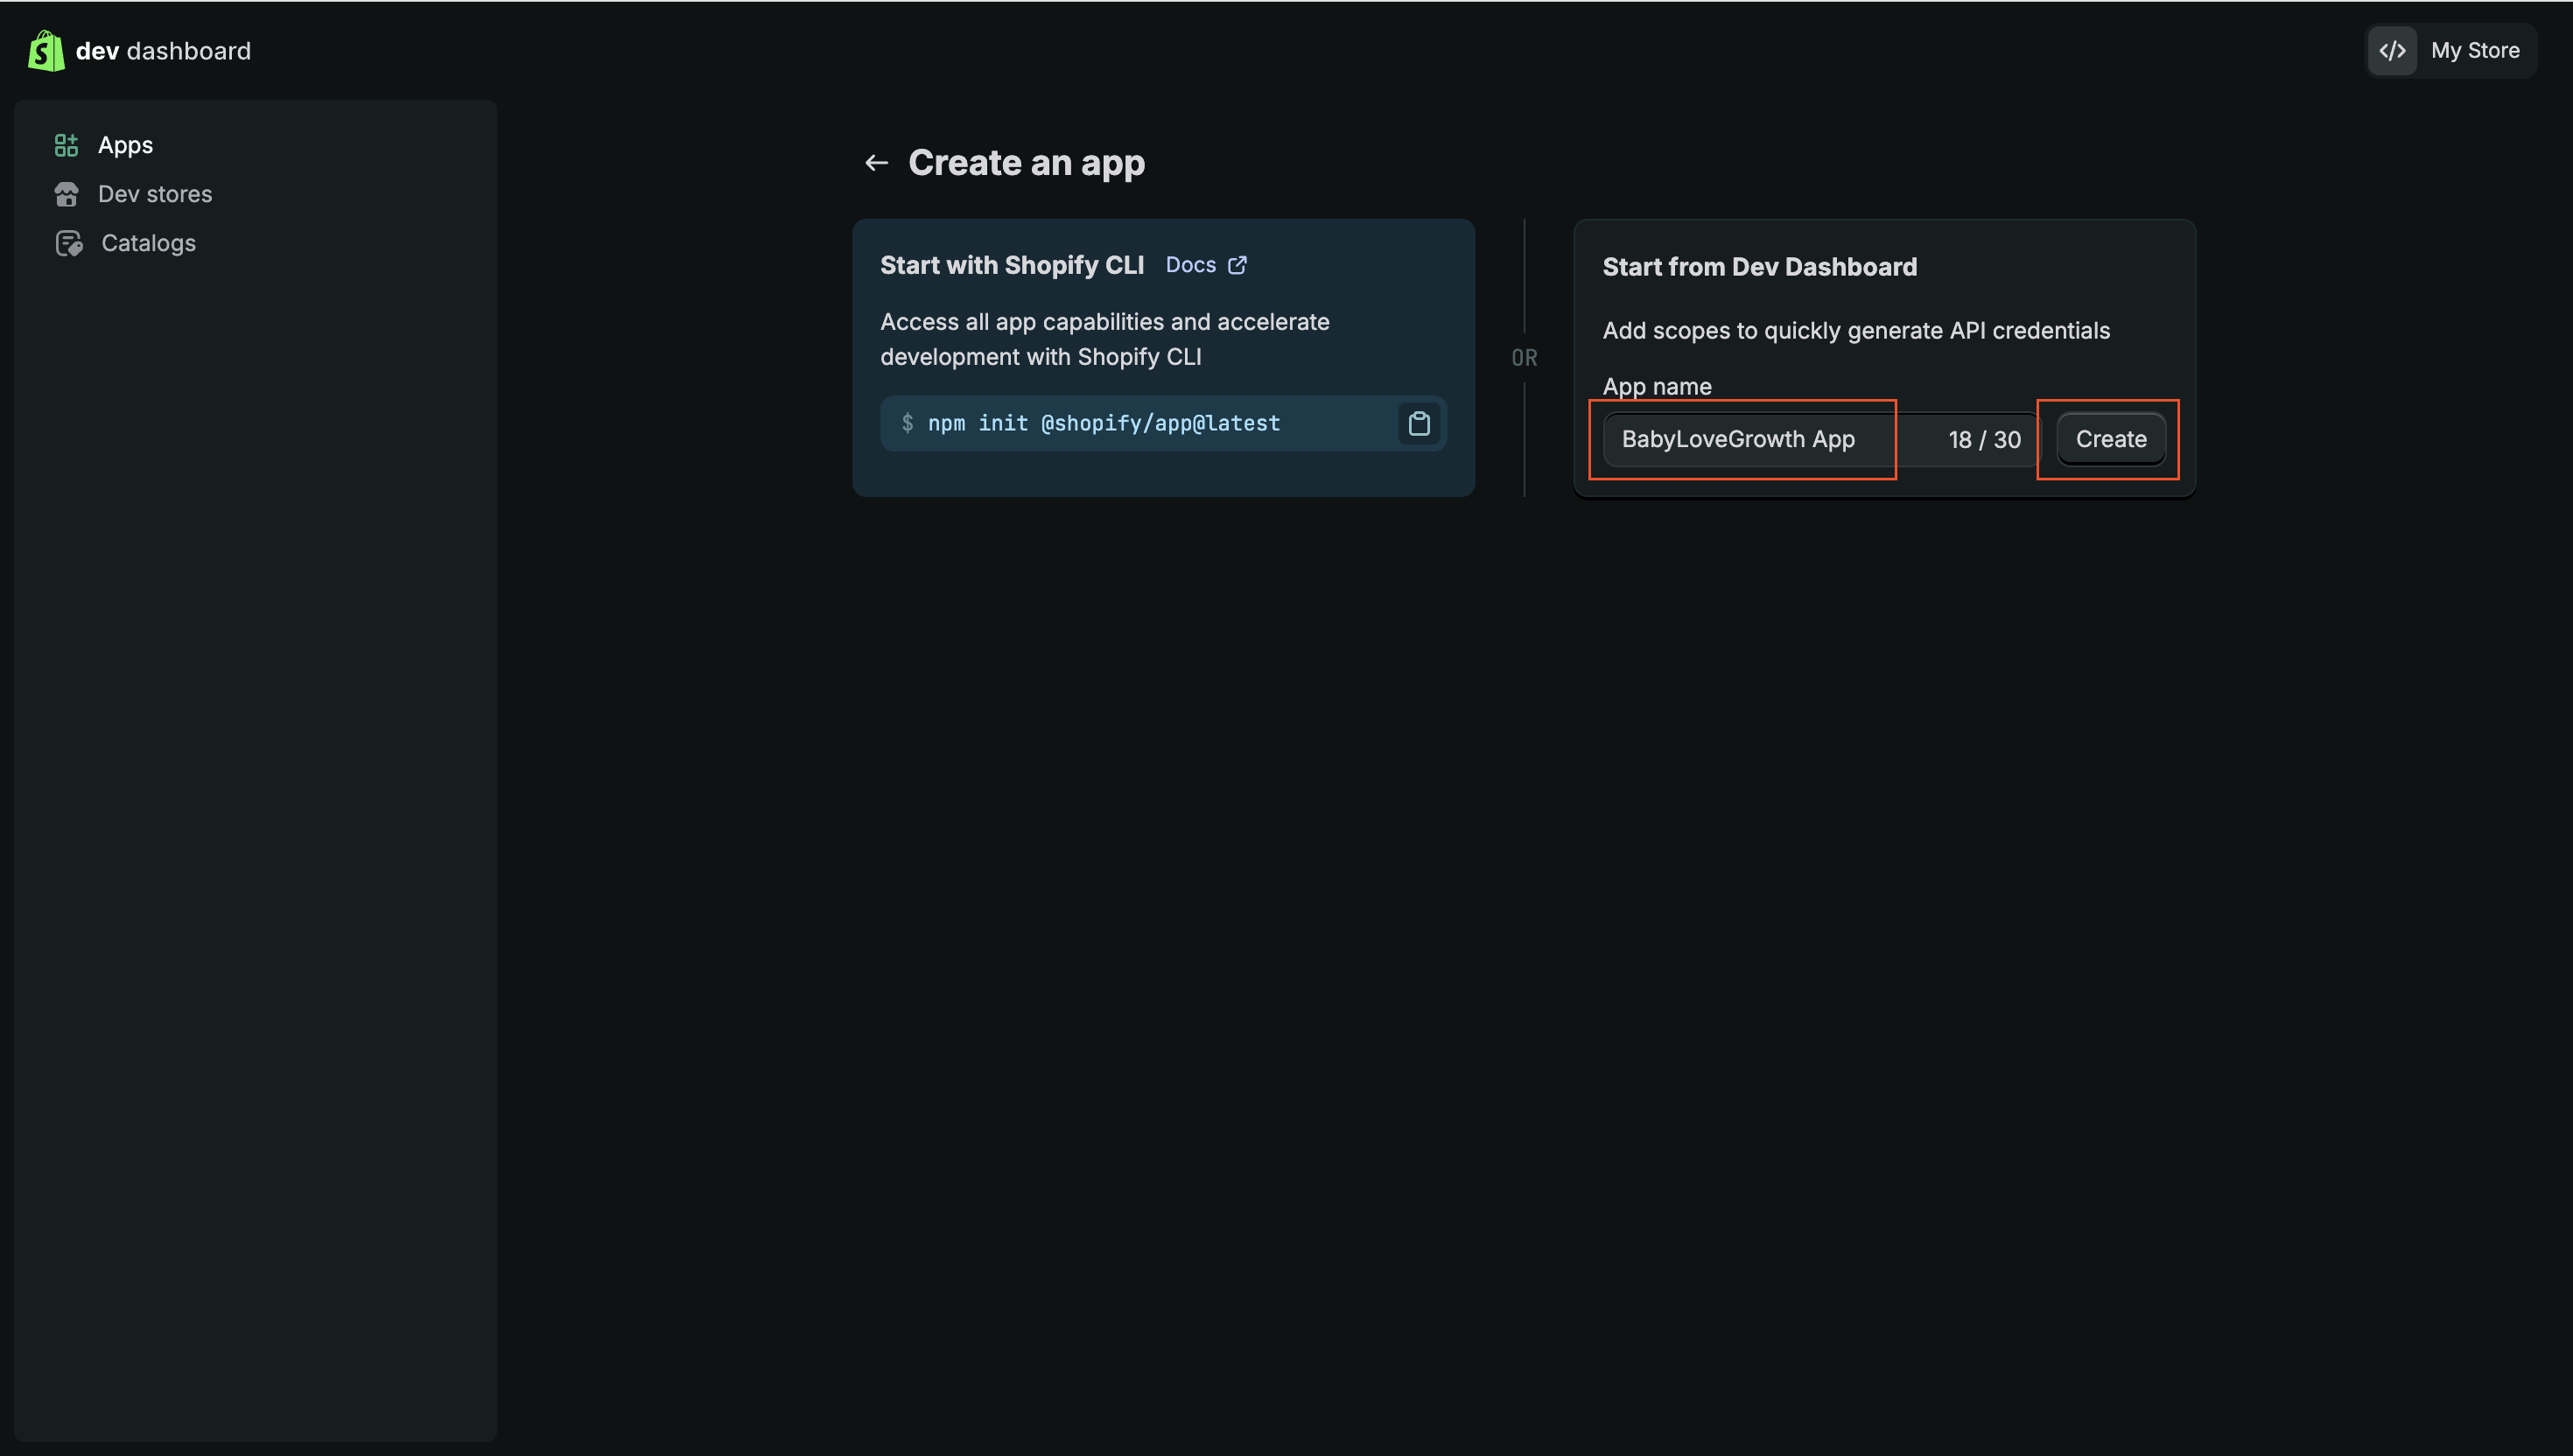
Step 3: Create a Shopify Appv
In your Shopify admin, follow Apps → Develop apps → Build apps in Dev Dashboard. Then:
Click Create app
- Name it anything — e.g. "Blog Publisher"
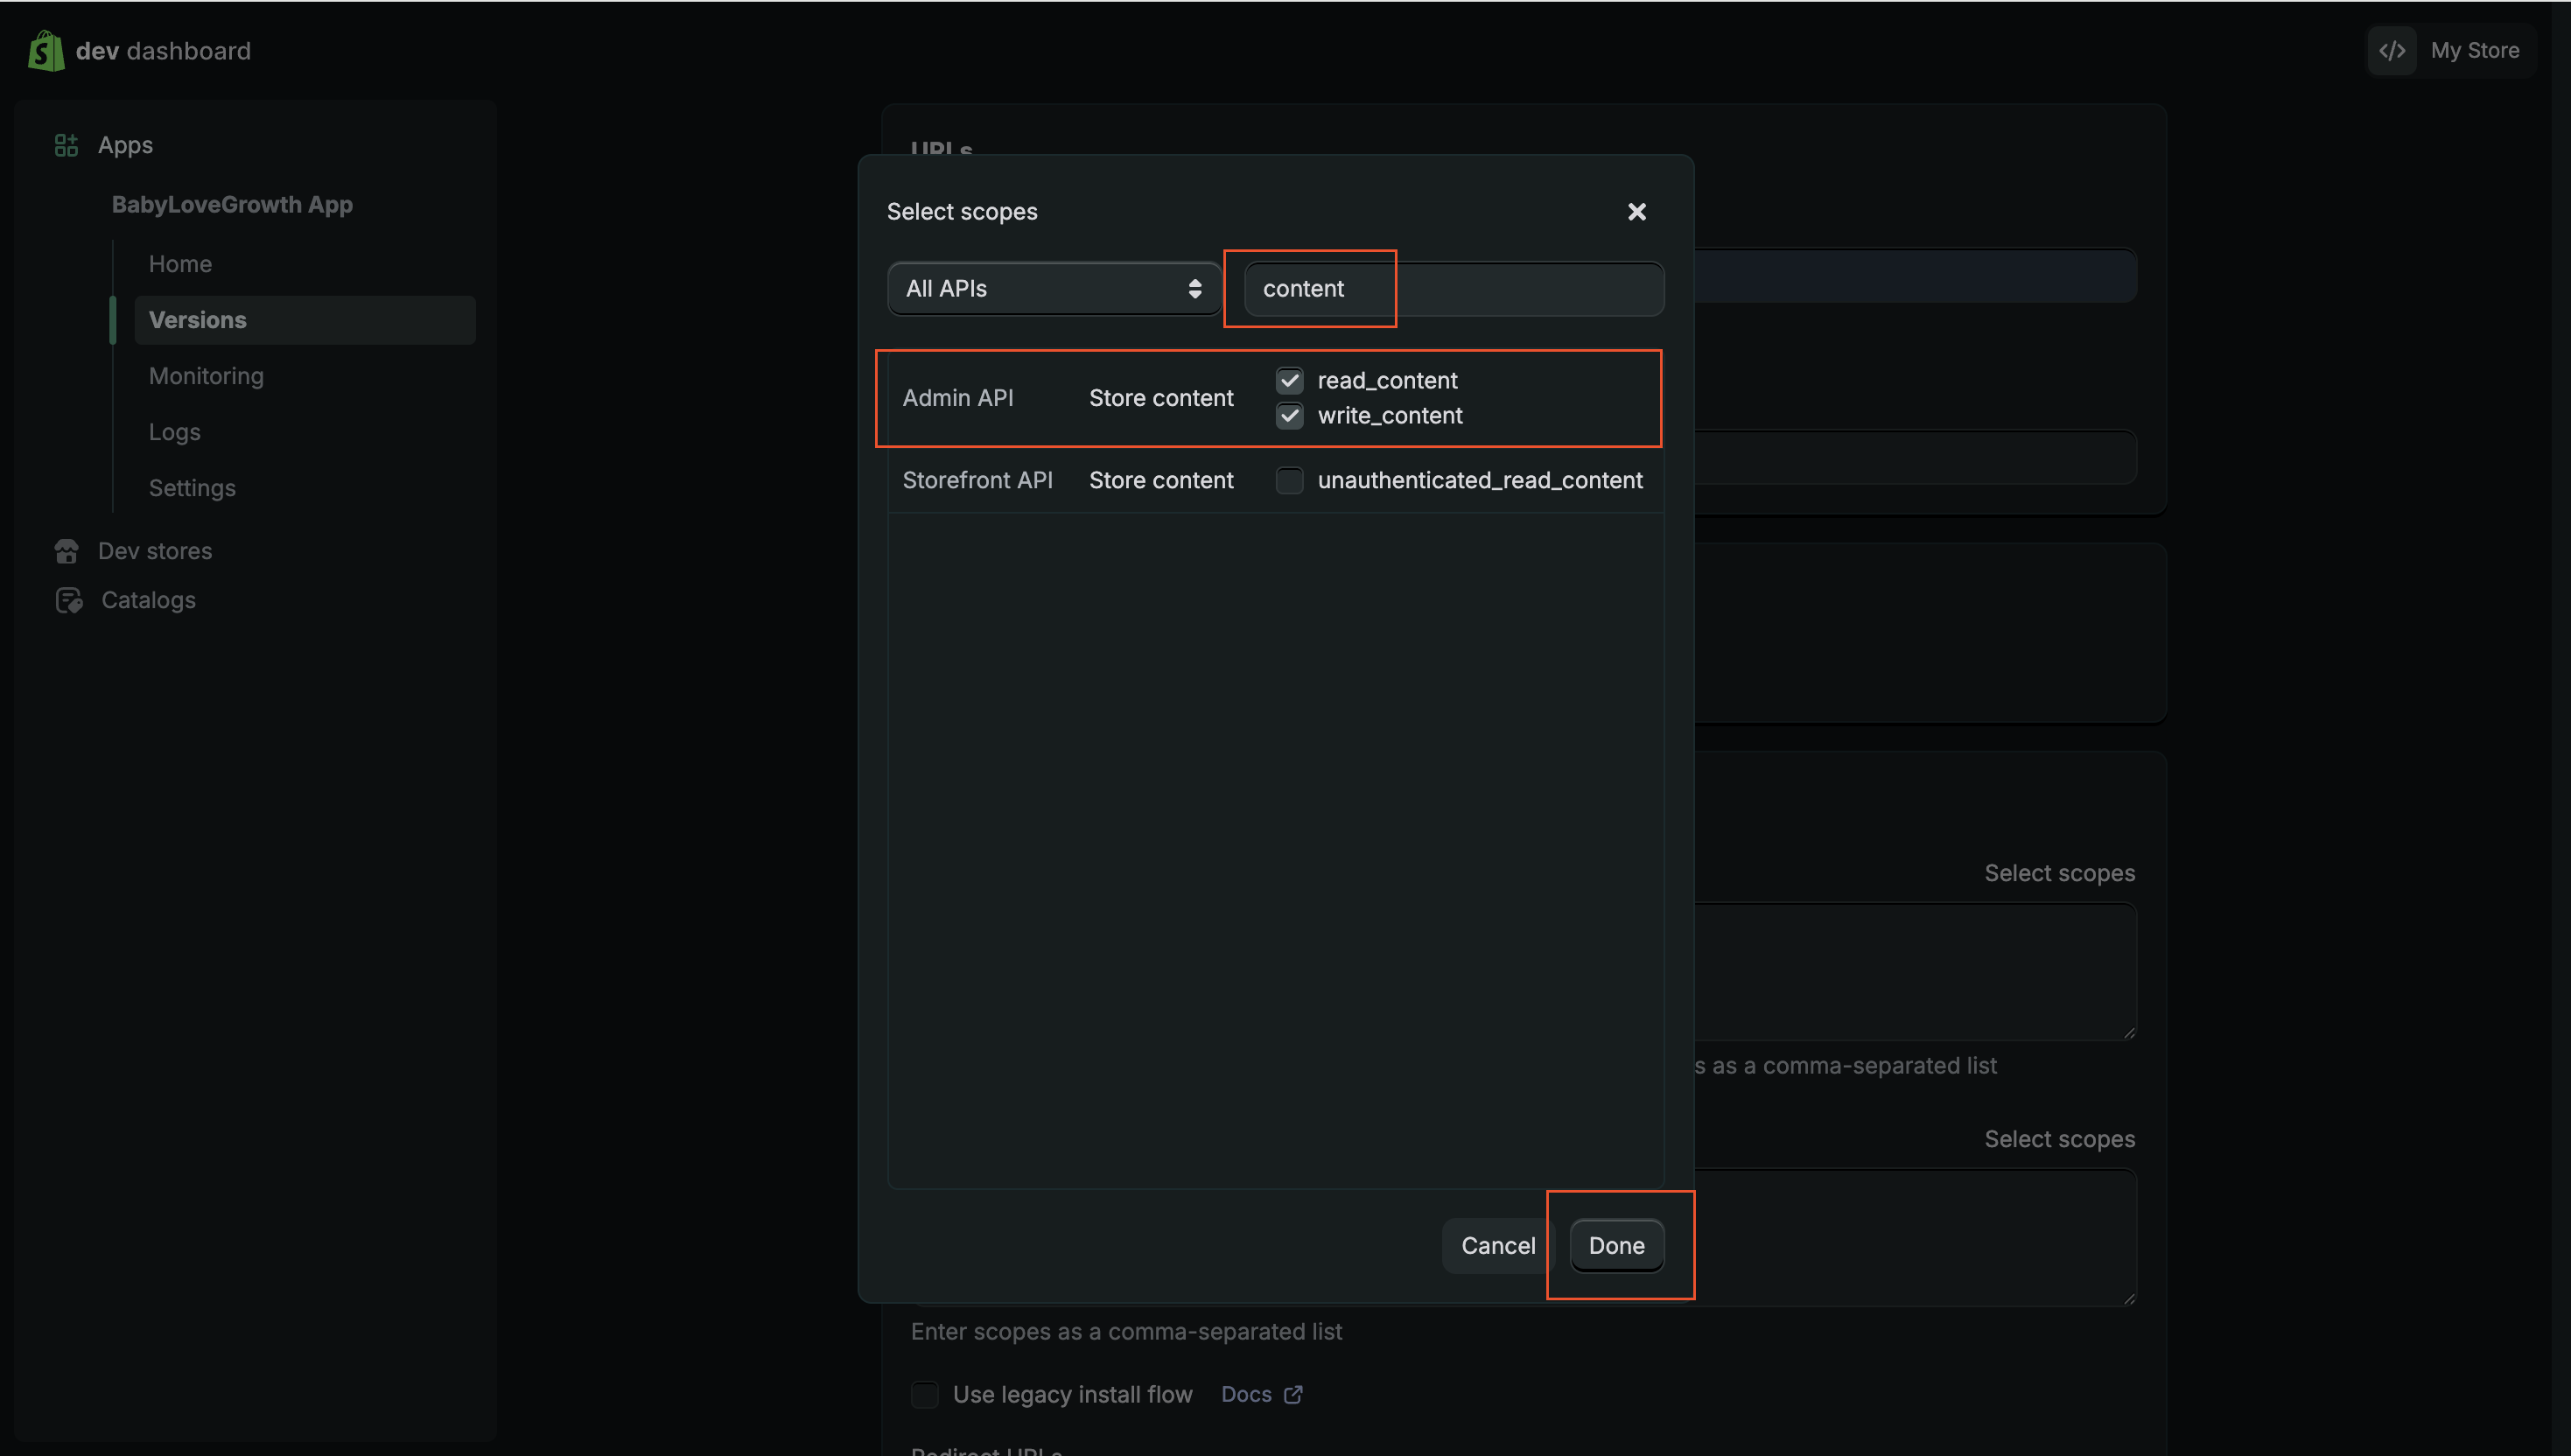
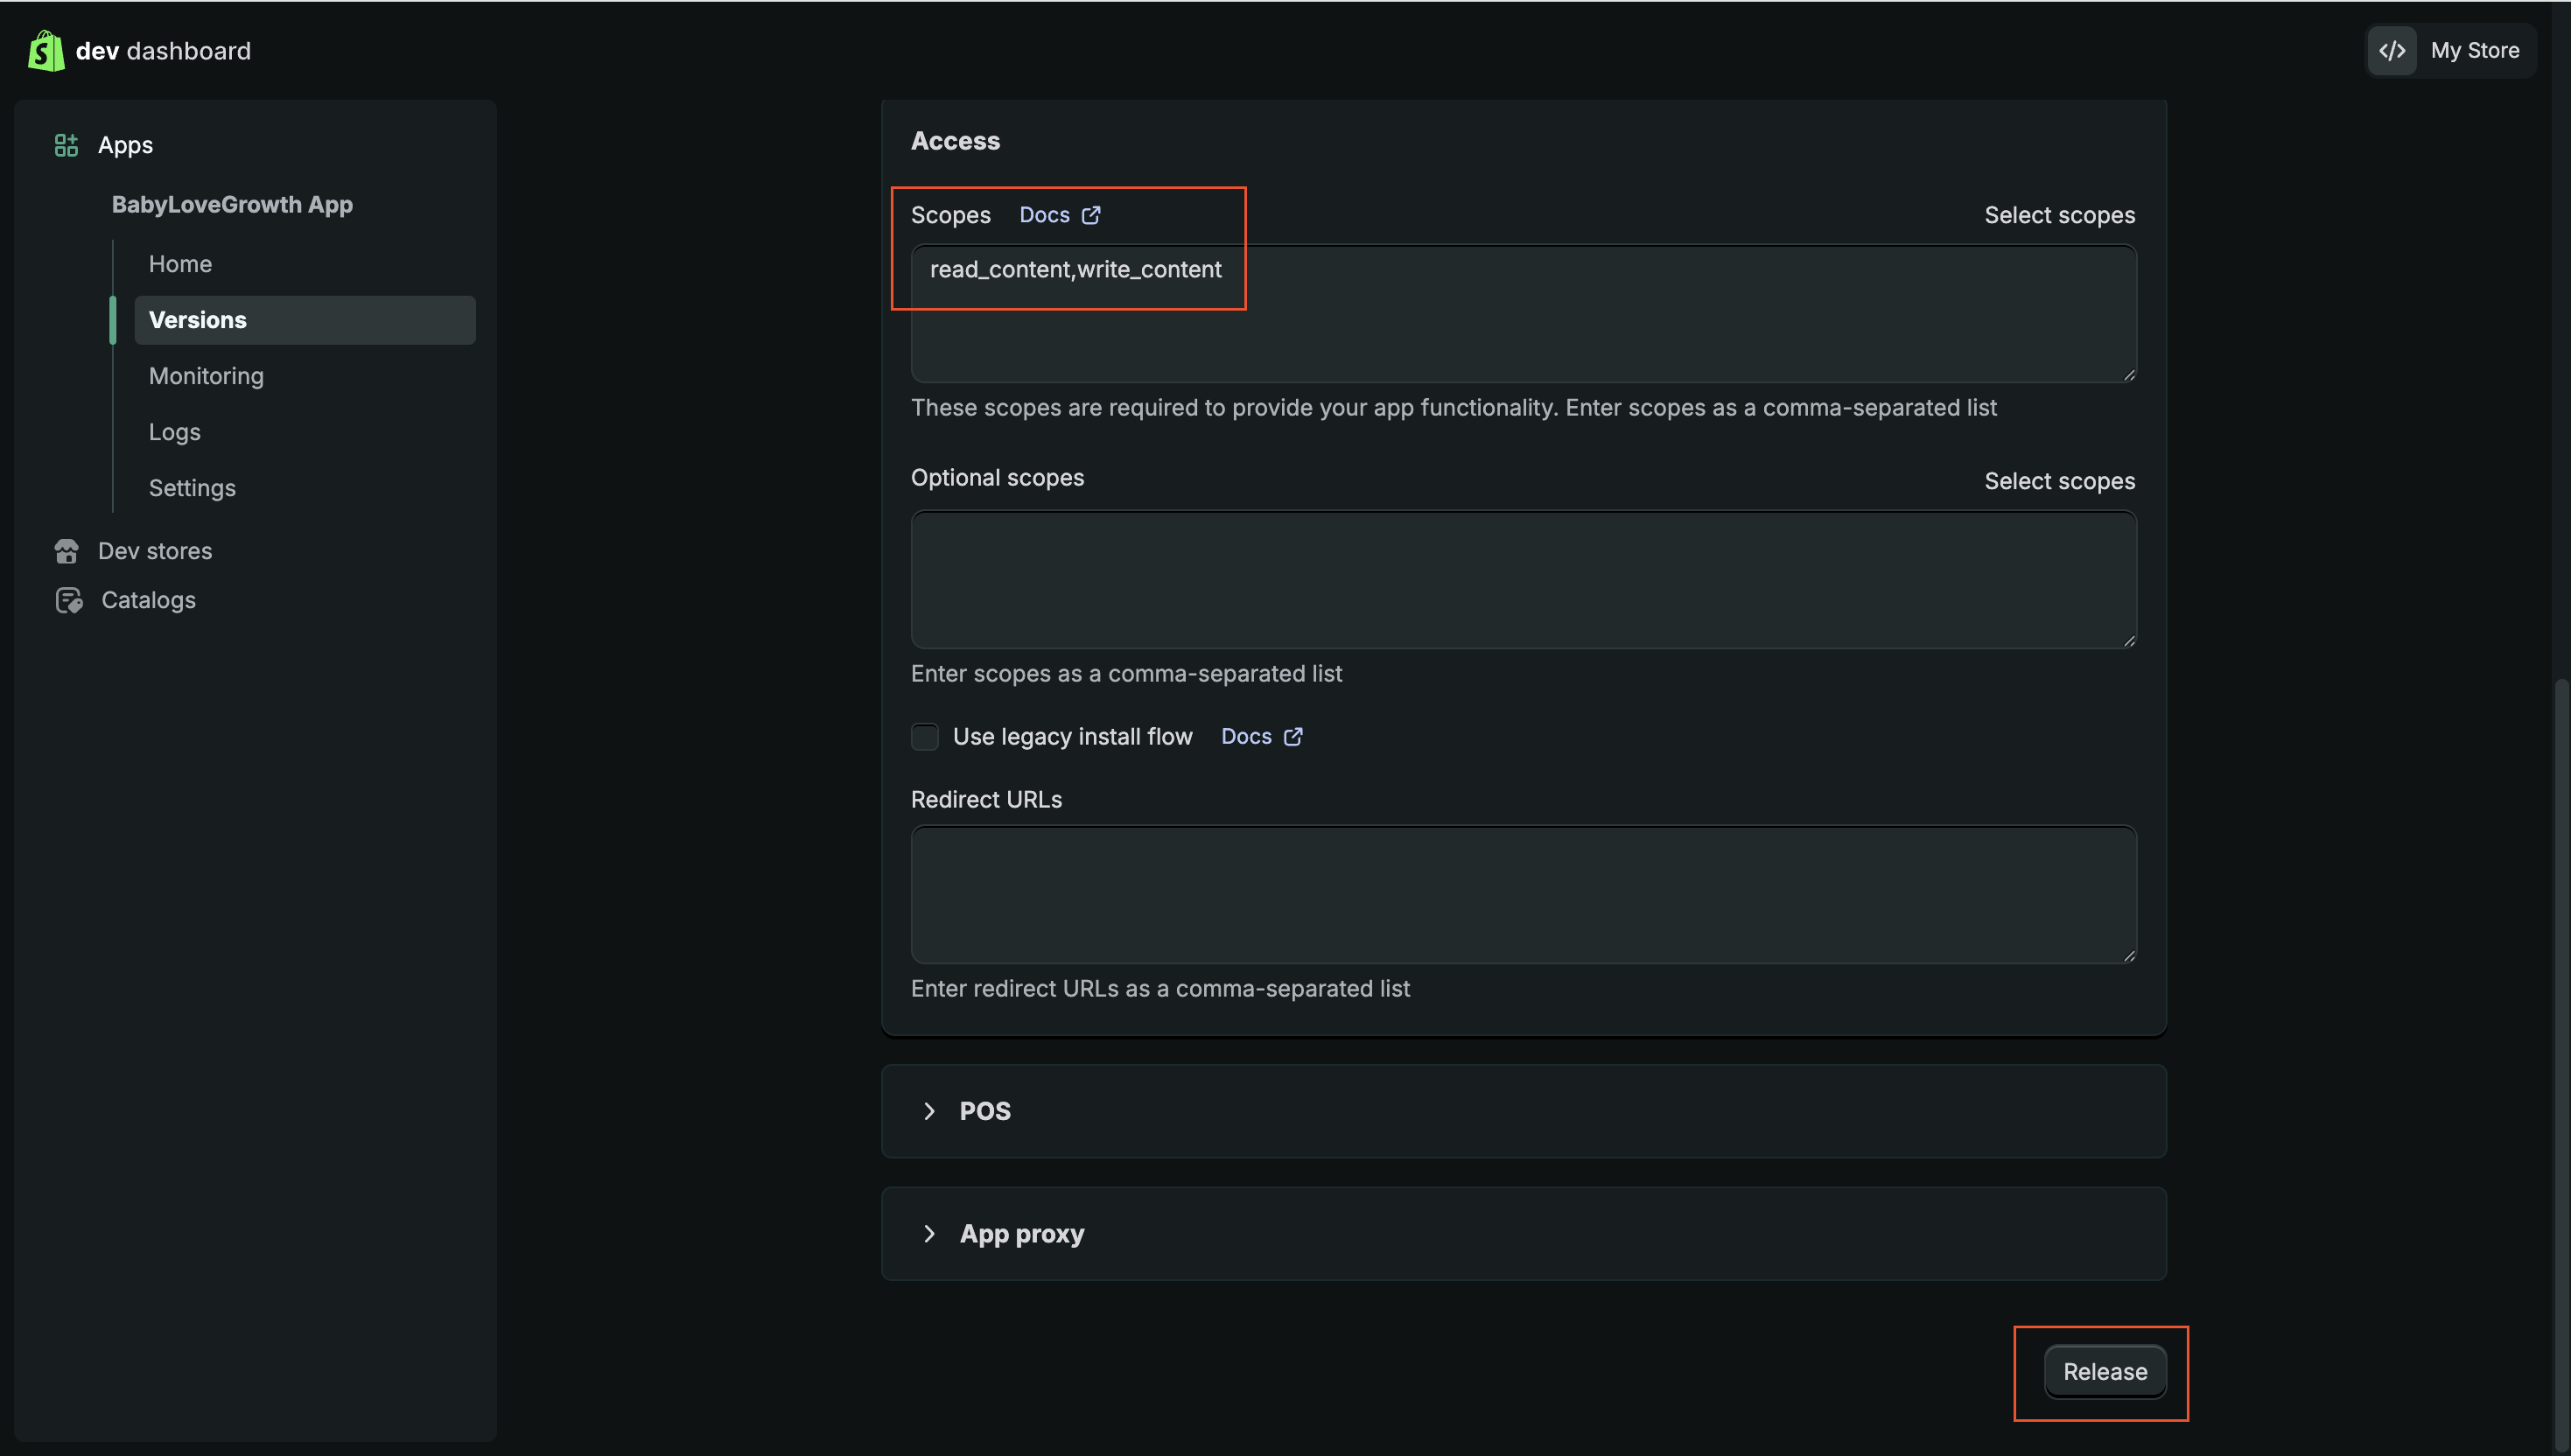
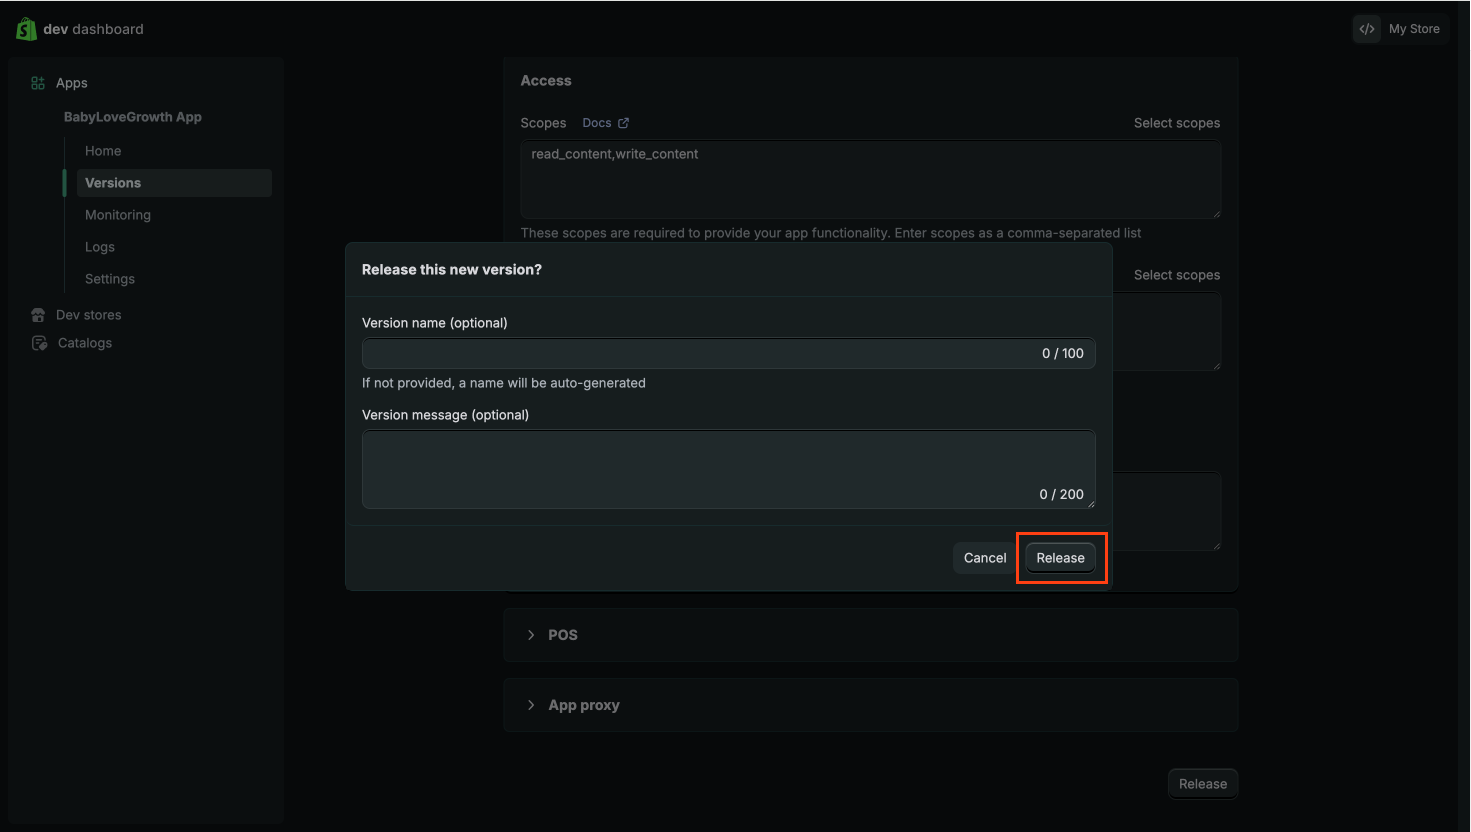
Step 4: Set content permissionsv
In your app, go to Access → Select scopes. Search "content" and enable both:
- read_content
- write_content
After enabling, click Done → Release (the version name can be left blank) and confirm.
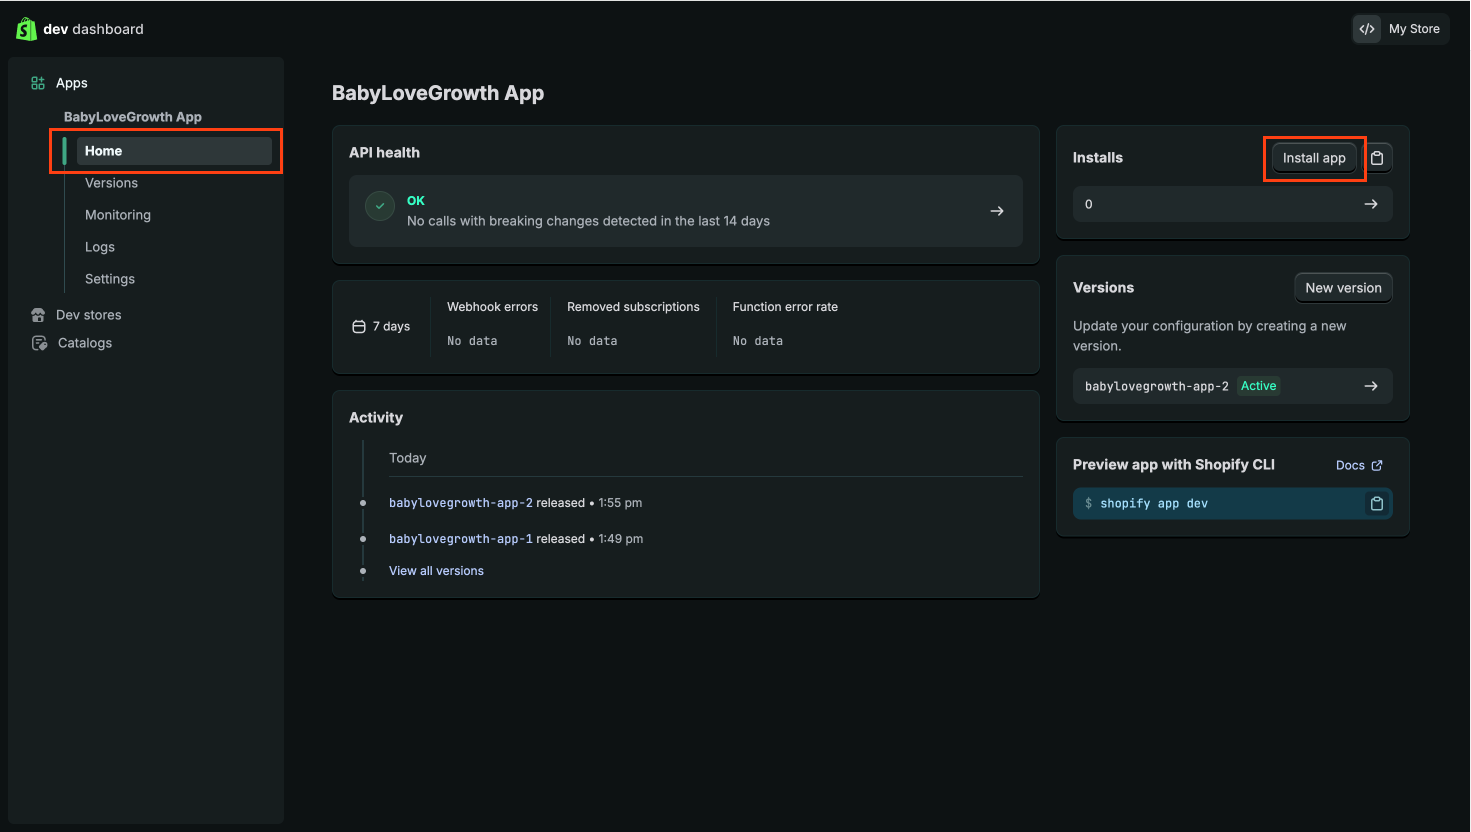
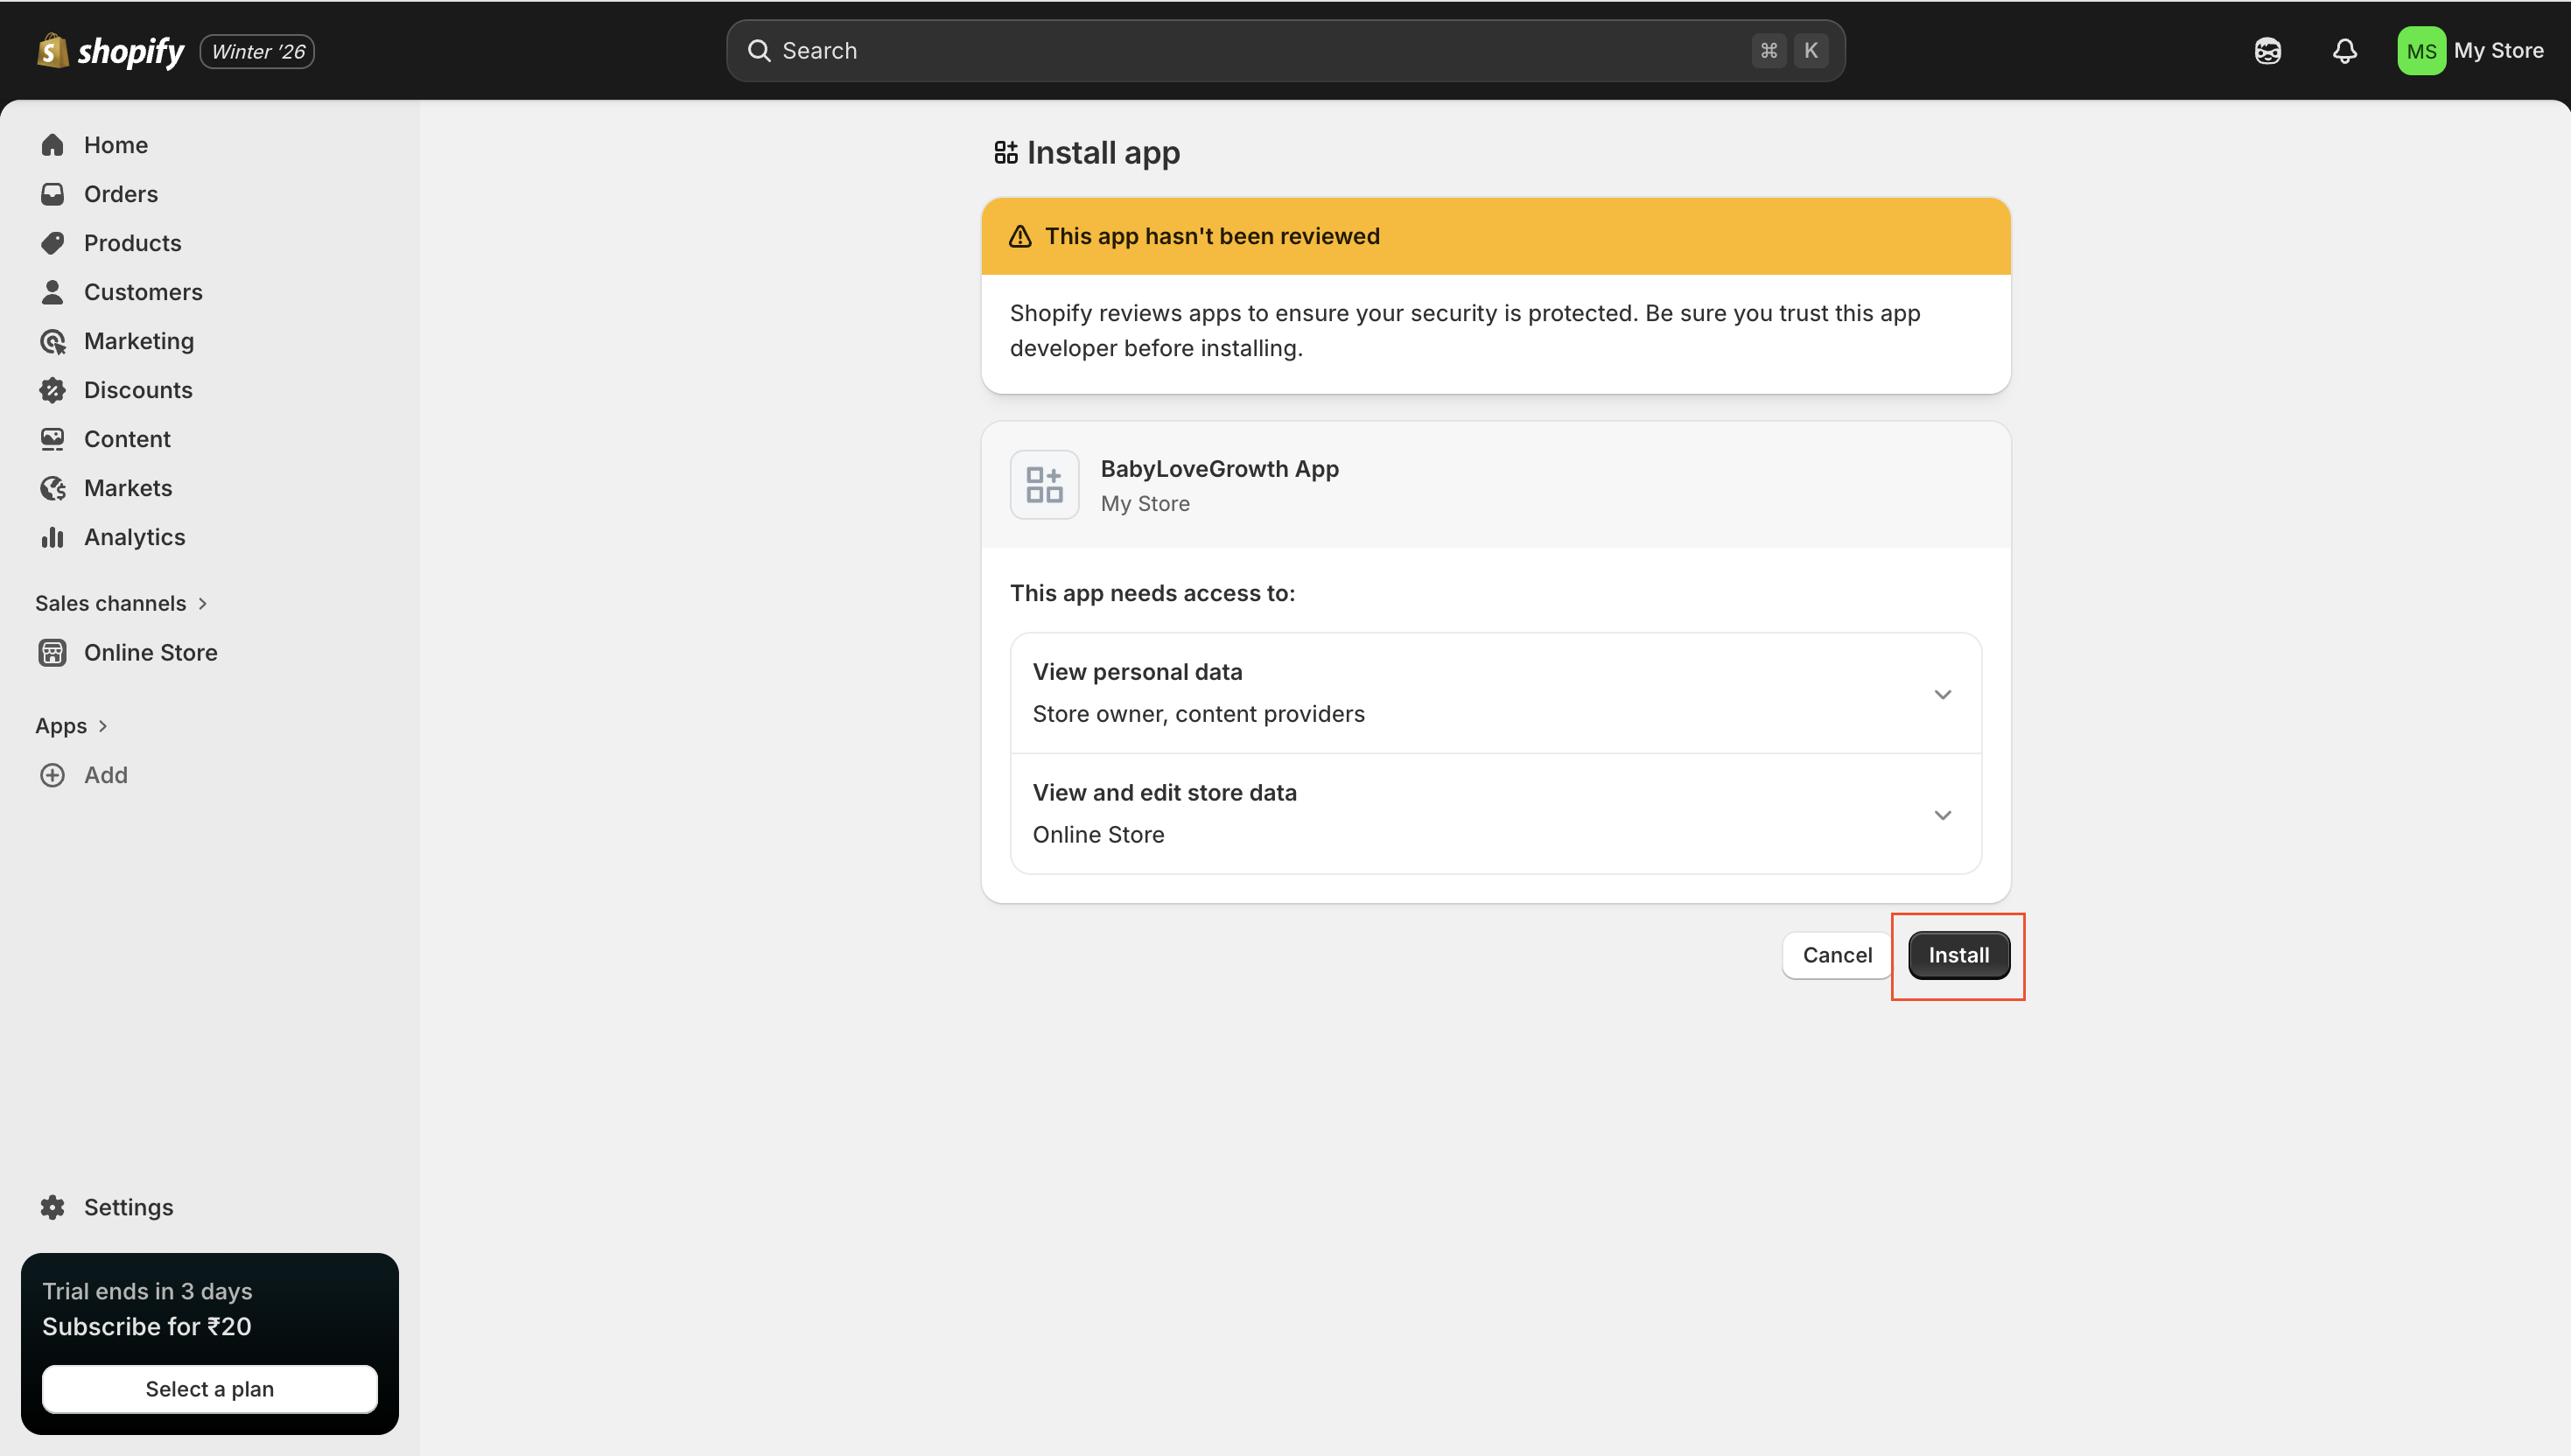
Step 5: Install the appv
Back in the Dev Dashboard, open your app and install it to your store:
In the app sidebar, click Home, then Install app (top right)
- Confirm the installation in your Shopify store dashboard
Verify the app appears under Apps in your store before continuing
Step 6: Copy your credentialsv
In the Dev Dashboard, open your app → Settings. Copy both values and paste them into the wizard:
- Client ID
- Client Secret

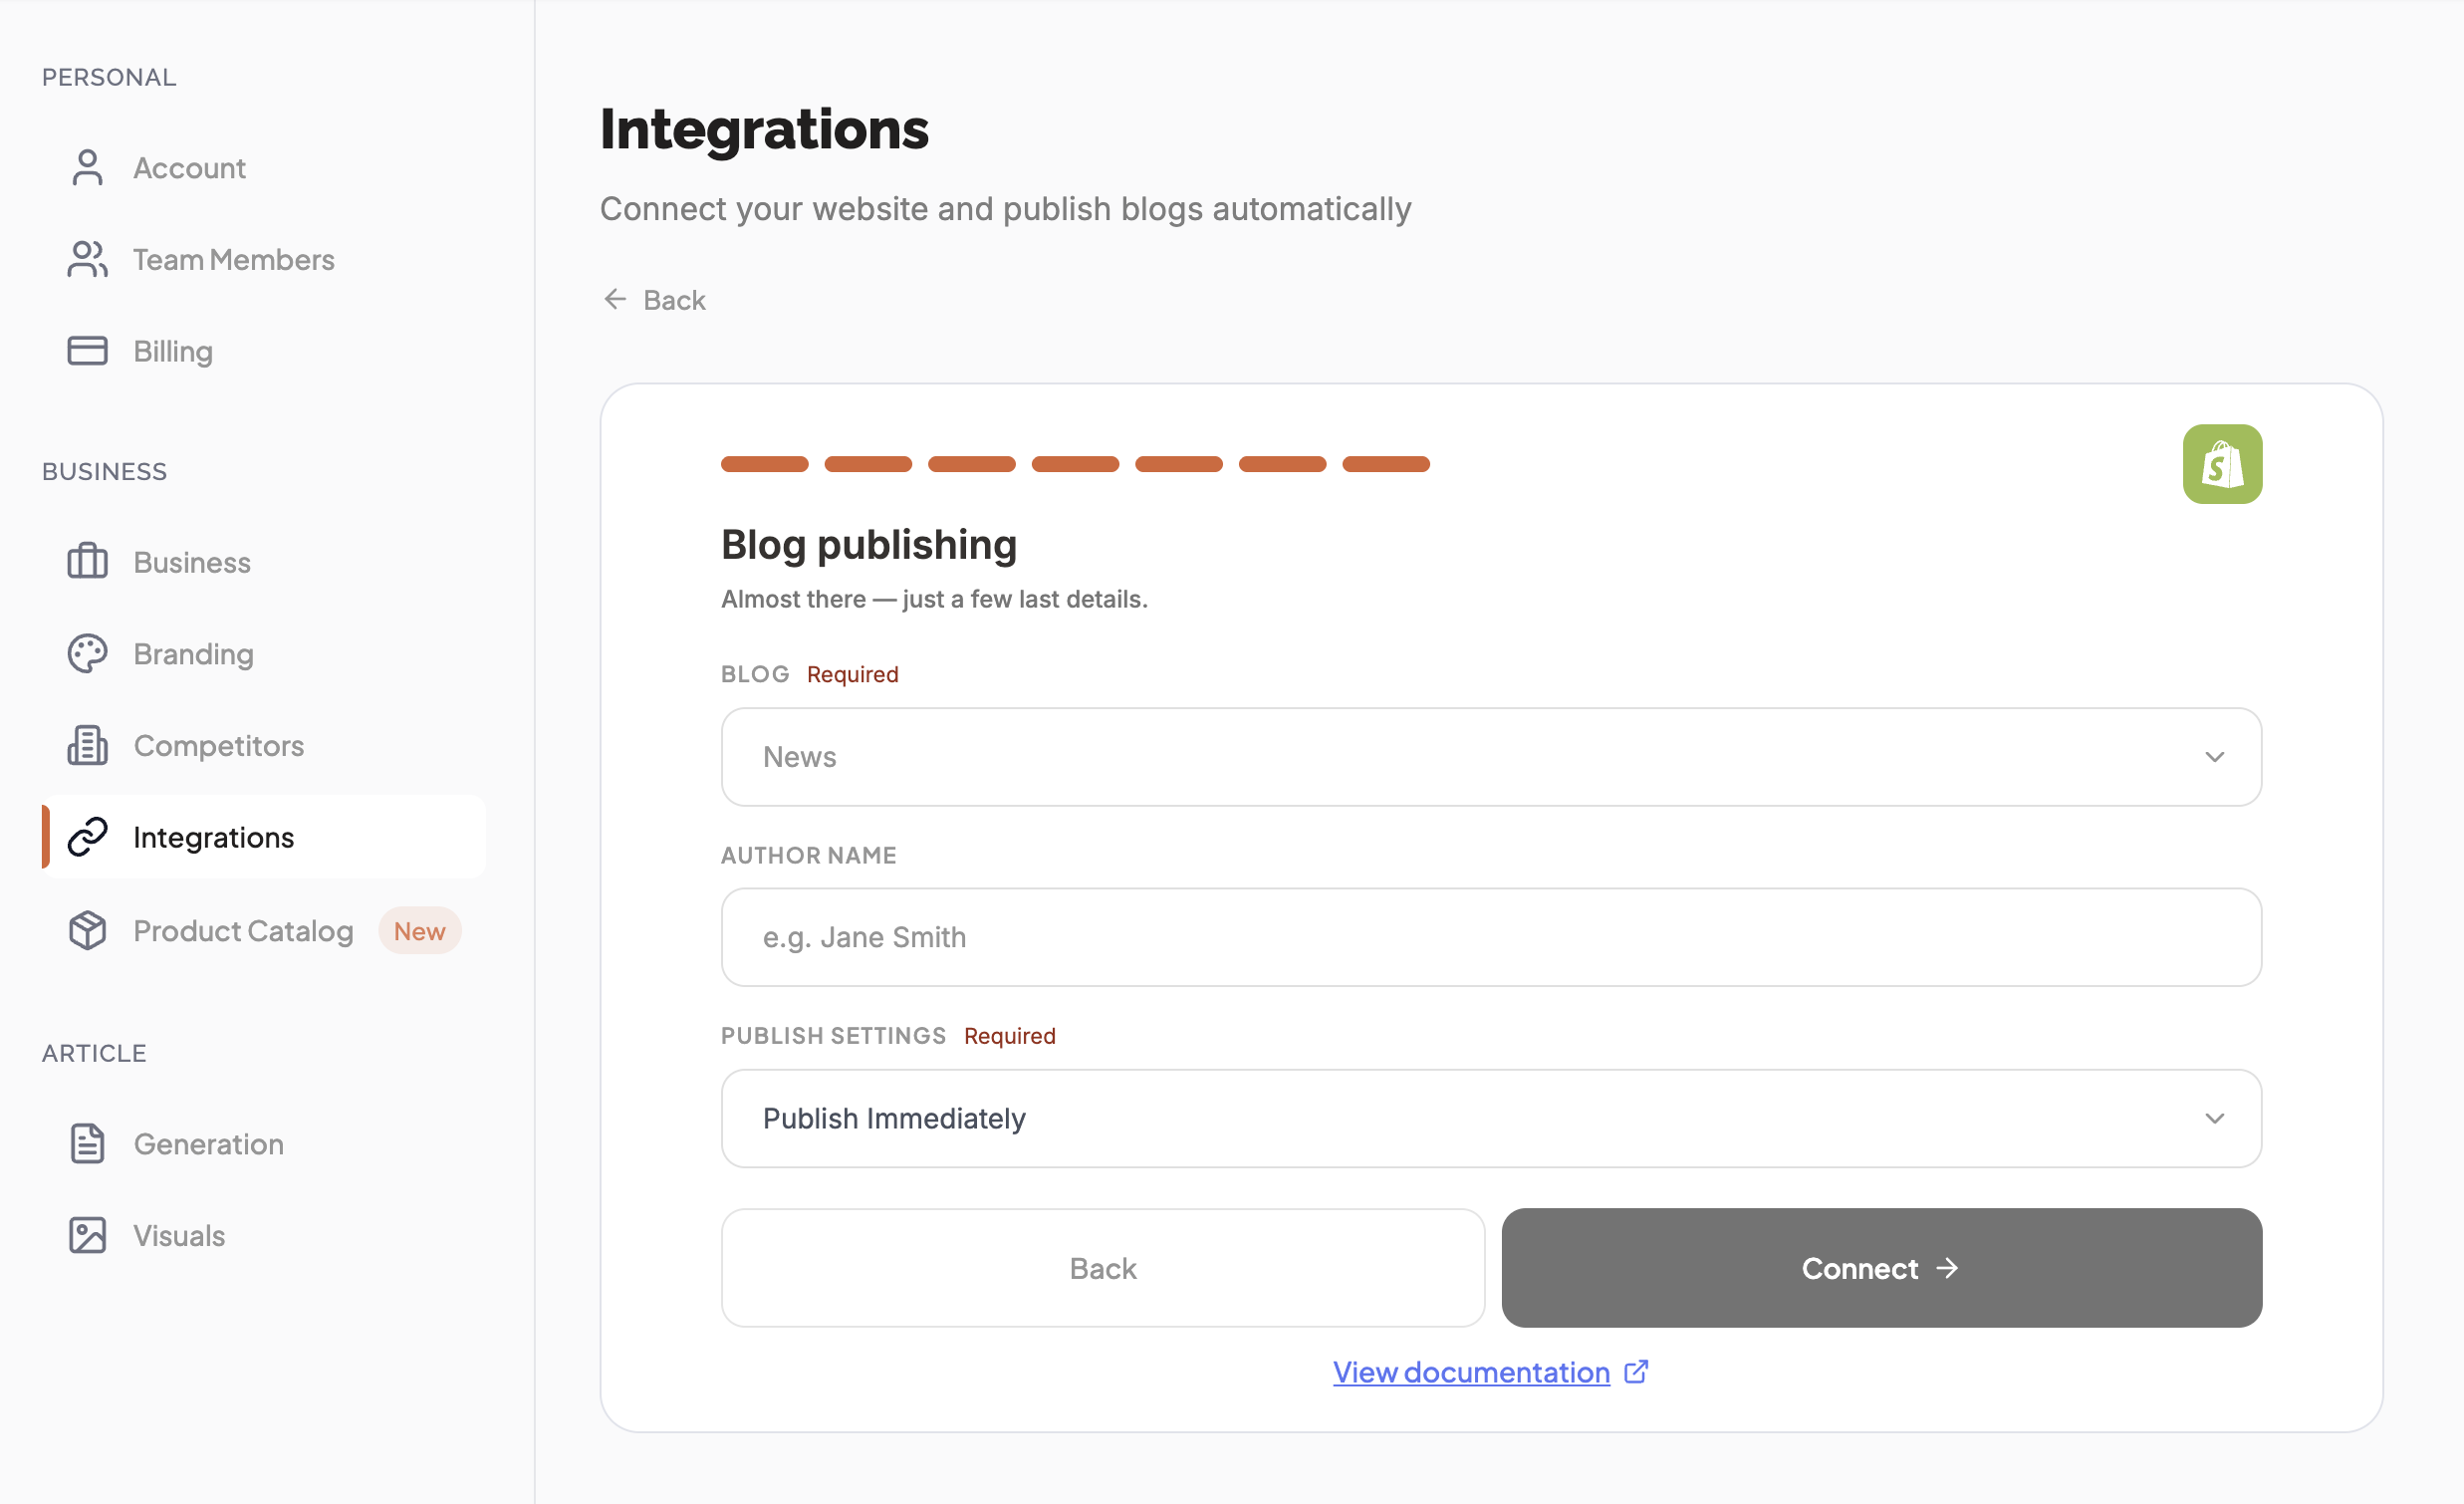
Step 7: Blog publishingv
Almost there — just a few last details:
Blog — select the blog new articles should post to (create one in Shopify if none appears)
Author Name — the name shown as the post author
Publish Settings — Publish Immediately to go live, or Save as Draft to review first
Click Connect to finish. You'll see the Shopify connected! screen.
Publishing & Verifyingv
With Automatically Publish on (toggle at the top of the Integrations page), new articles publish to Shopify on their own. To verify the connection right away:
Go to your Content Plan
- Publish or re-publish any article
In Shopify, open your site → CMS → Blog Posts
- You'll see the article appear there
Tips & Best Practicesv
- Make sure your blog exists in Shopify so it appears in the Blog dropdown
Use your
.myshopify.comstore name (not a custom domain) for the connectionSave as Draft lets you review in Shopify before going live; Publish Immediately makes articles live automatically
A legacy Access Token method is still available, but Client Credentials is recommended
Troubleshooting & FAQv
Cannot find blog?
Create a blog in Shopify (Content → Blog posts → Manage blogs → Add blog), then reload the blog dropdown in Step 7.
Connection fails?
Re-check your Store Name (from .myshopify.com), Client ID, and Client Secret;
ensure scopes read_content and write_content are enabled.
App not visible in store Apps?
Make sure you completed the Install step (Step 5) in the store dashboard.
Publish issues?
Confirm the integration shows Connected and your blog selection is valid.
Firewall/security apps blocking requests?
If requests are blocked, allow BabyLoveGrowth; if needed, contact support via the chat icon.
Do I need a special Shopify plan?
Any plan that allows creating and installing custom apps works.
Will posts go live immediately?
Only if you choose Publish Immediately. Choose Save as Draft to review first.
Can I change the author name?
Yes. Set any author name in Step 7 (or via Manage); Shopify uses it for the post.
Which store name do I enter?
The part before .myshopify.com (e.g. na70yq-bn).
Need more help?
Contact support via the chat icon in the bottom-right corner.