
Webflow
Connect BabyLoveGrowth to Webflow and publish articles on auto-pilot.
The Webflow integration lets BabyLoveGrowth publish articles directly to your Webflow CMS. Once connected, every newly generated article is published automatically — live or as a draft, your choice.
Blog content not displaying properly in the Webflow Editor?
This is a known limitation on Webflow's side. Blog content may not render correctly in the Webflow Editor (e.g. visible code, broken layout, Rich Text field issues).
See this confirmation from Webflow
. Content publishes successfully and will display correctly on your live website.
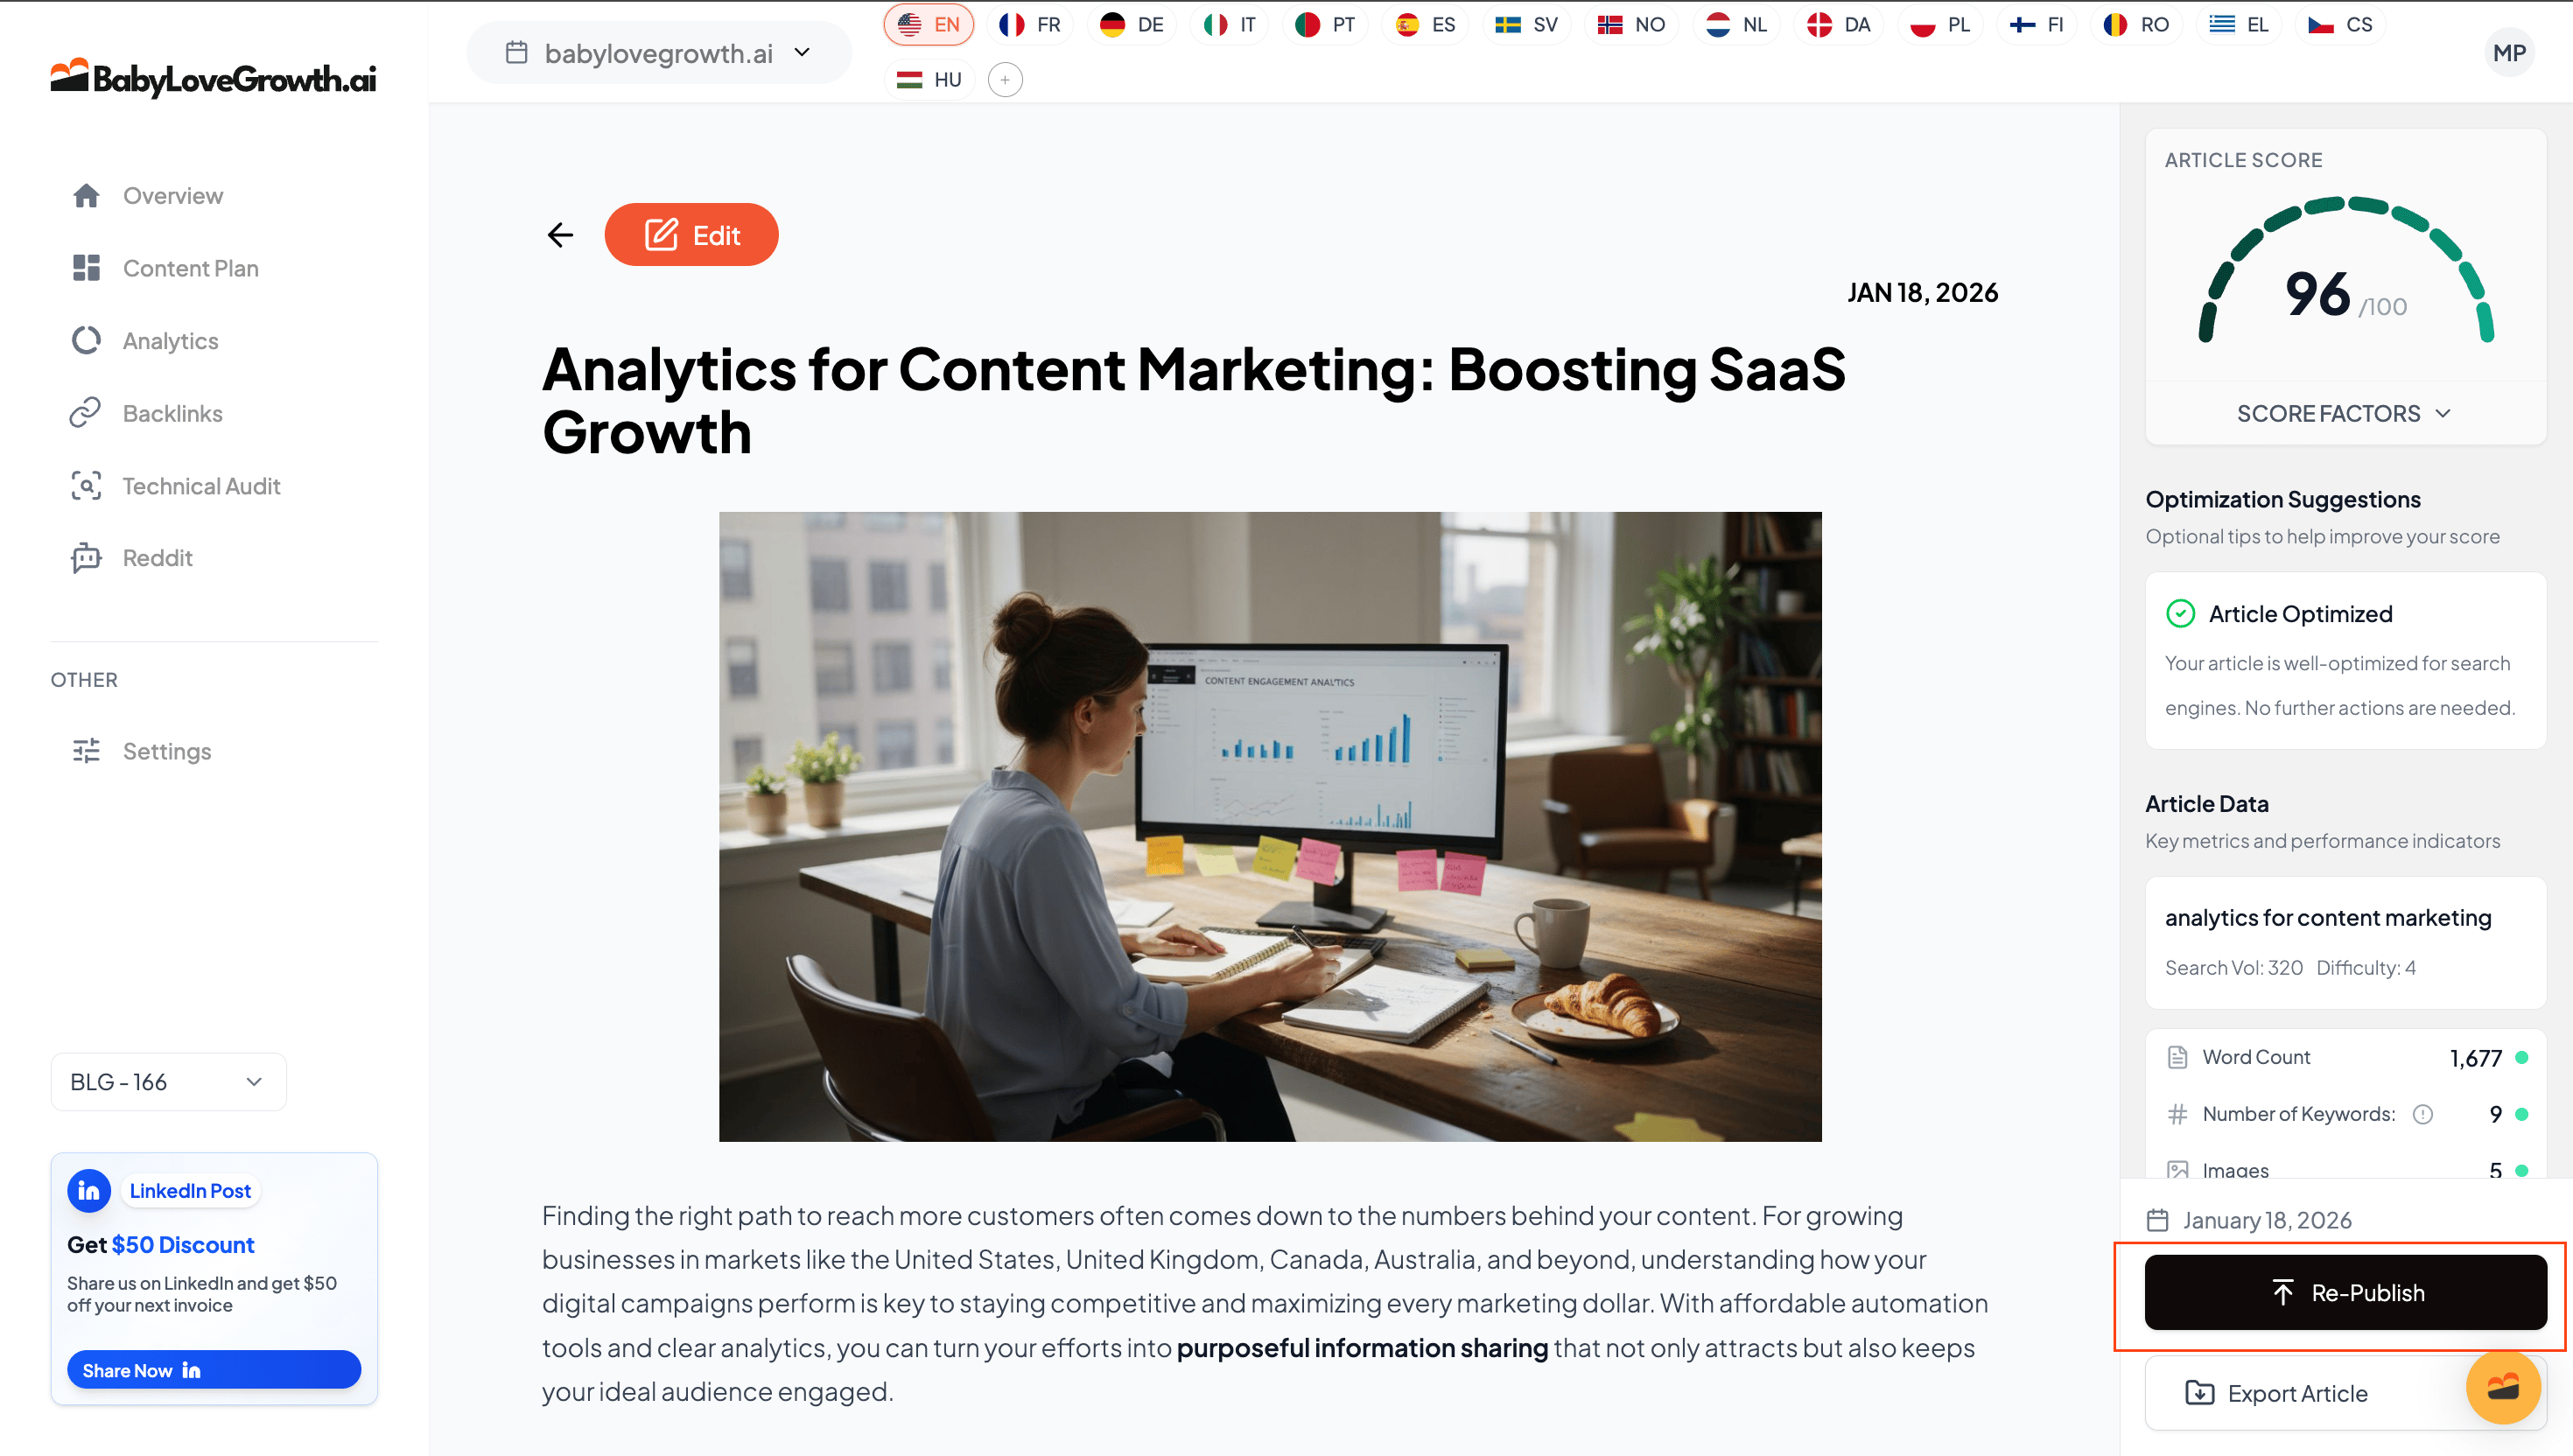
Integration Demo
How to Connect Webflow
Open Settings → Integrations, find Webflow under the CMS tab, and click Connect to launch the setup wizard. The wizard walks you through 5 short steps, mirrored below.
Already connected? The Webflow card shows a Connected badge — click Manage to update your site, collection, or publish settings at any time.
What You Needv
- Access to your Webflow workspace and site
- Permission to generate an API token
- A Webflow CMS Collection ready for blog posts (CMS plan or higher)
Step 1: Open your Webflow dashboardv
In the wizard, click Open Webflow Dashboard to jump to Webflow in a new tab, then sign in to the workspace where your site lives.
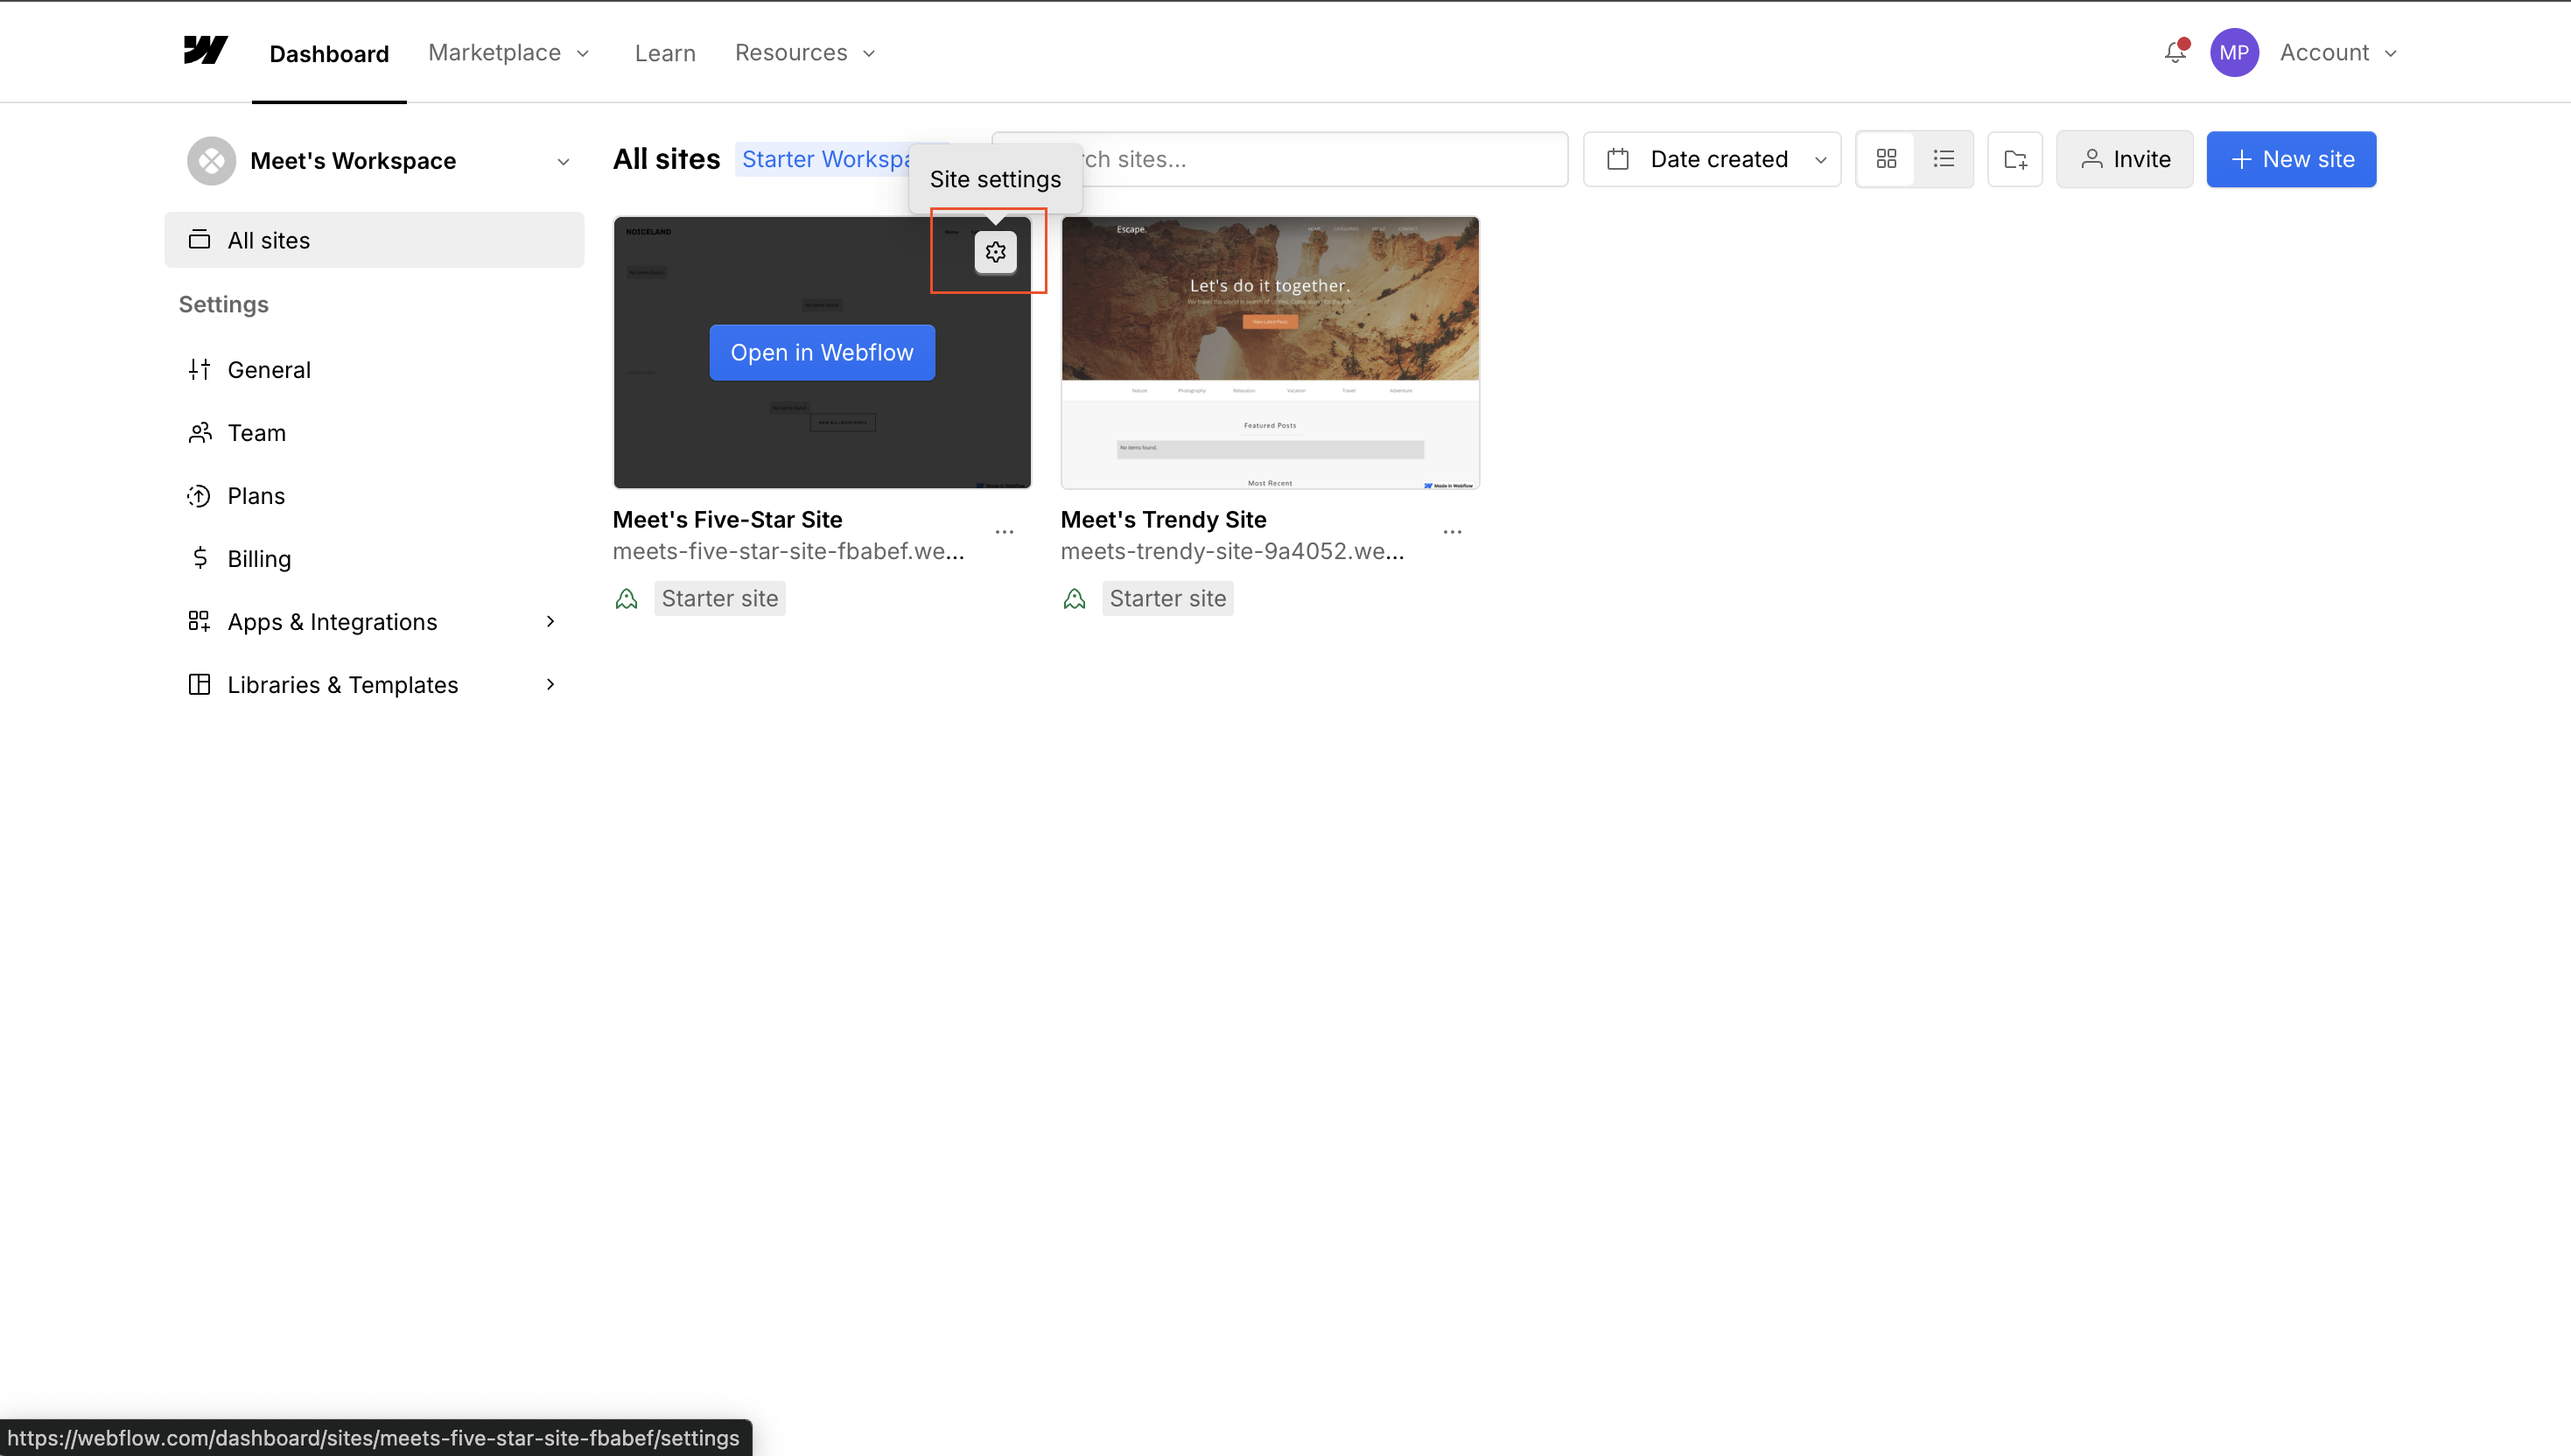
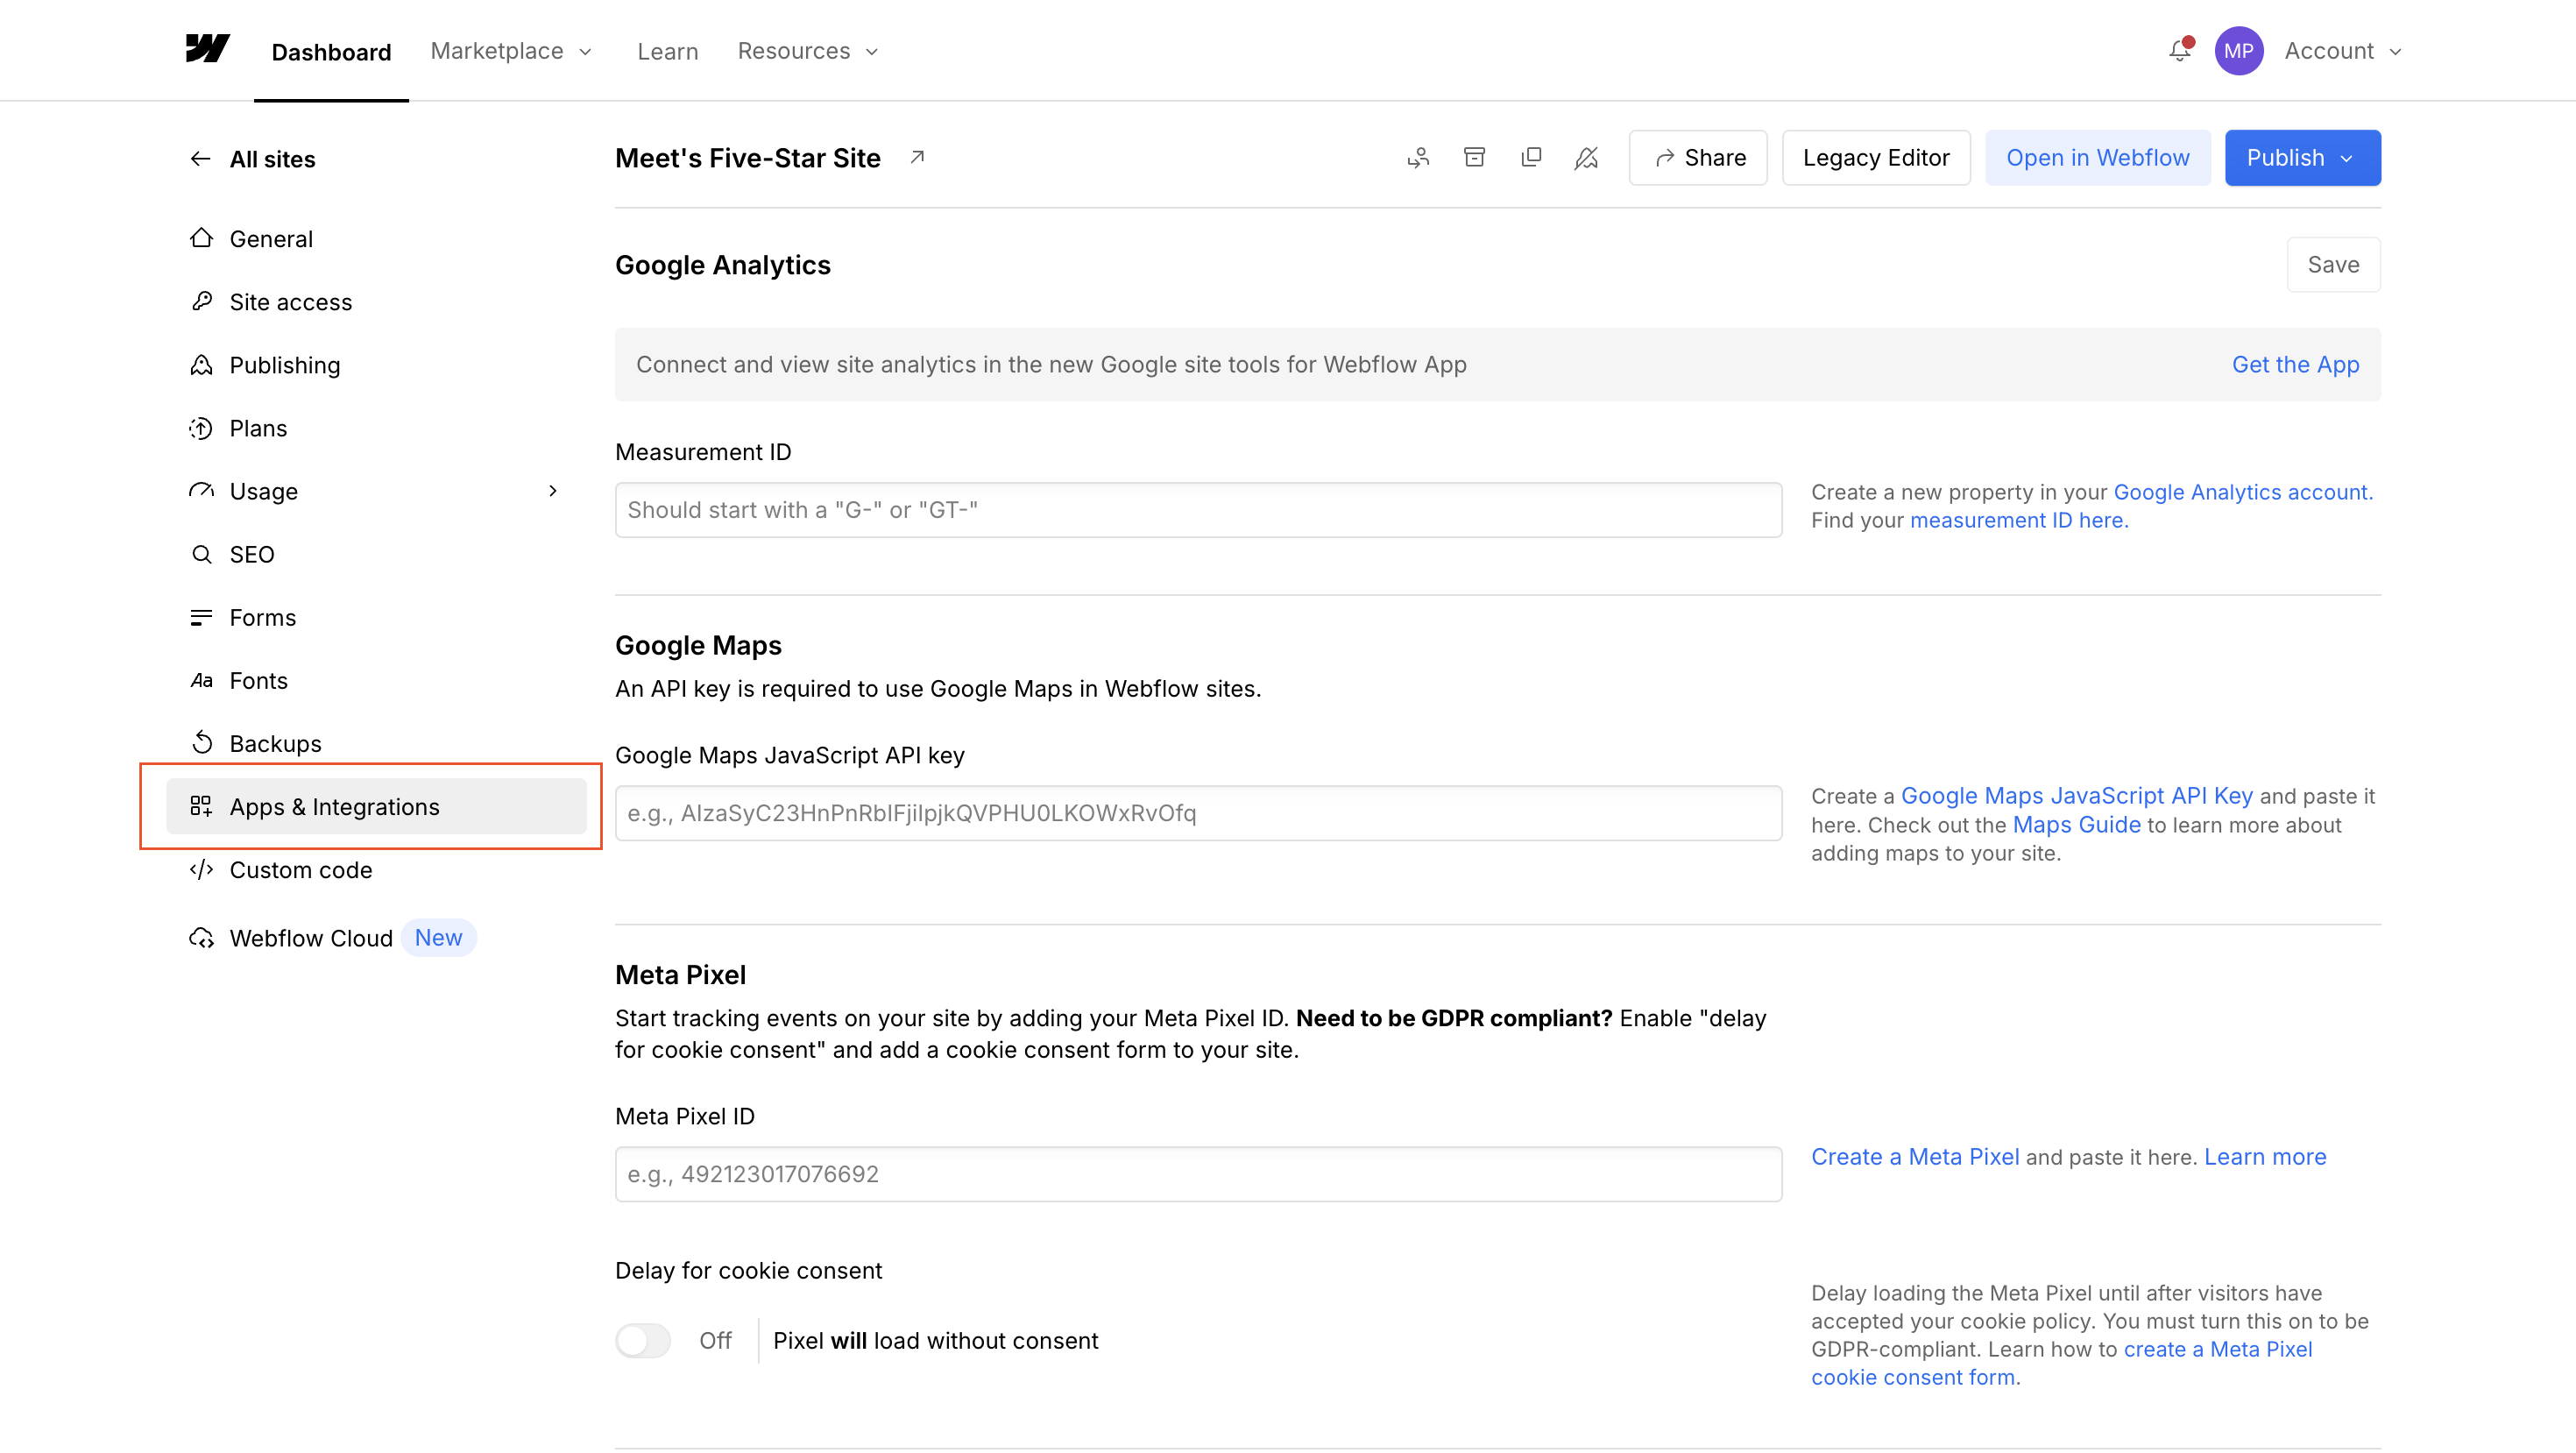
Step 2: Go to your Webflow site settingsv
Find your site and click the Settings (gear) icon
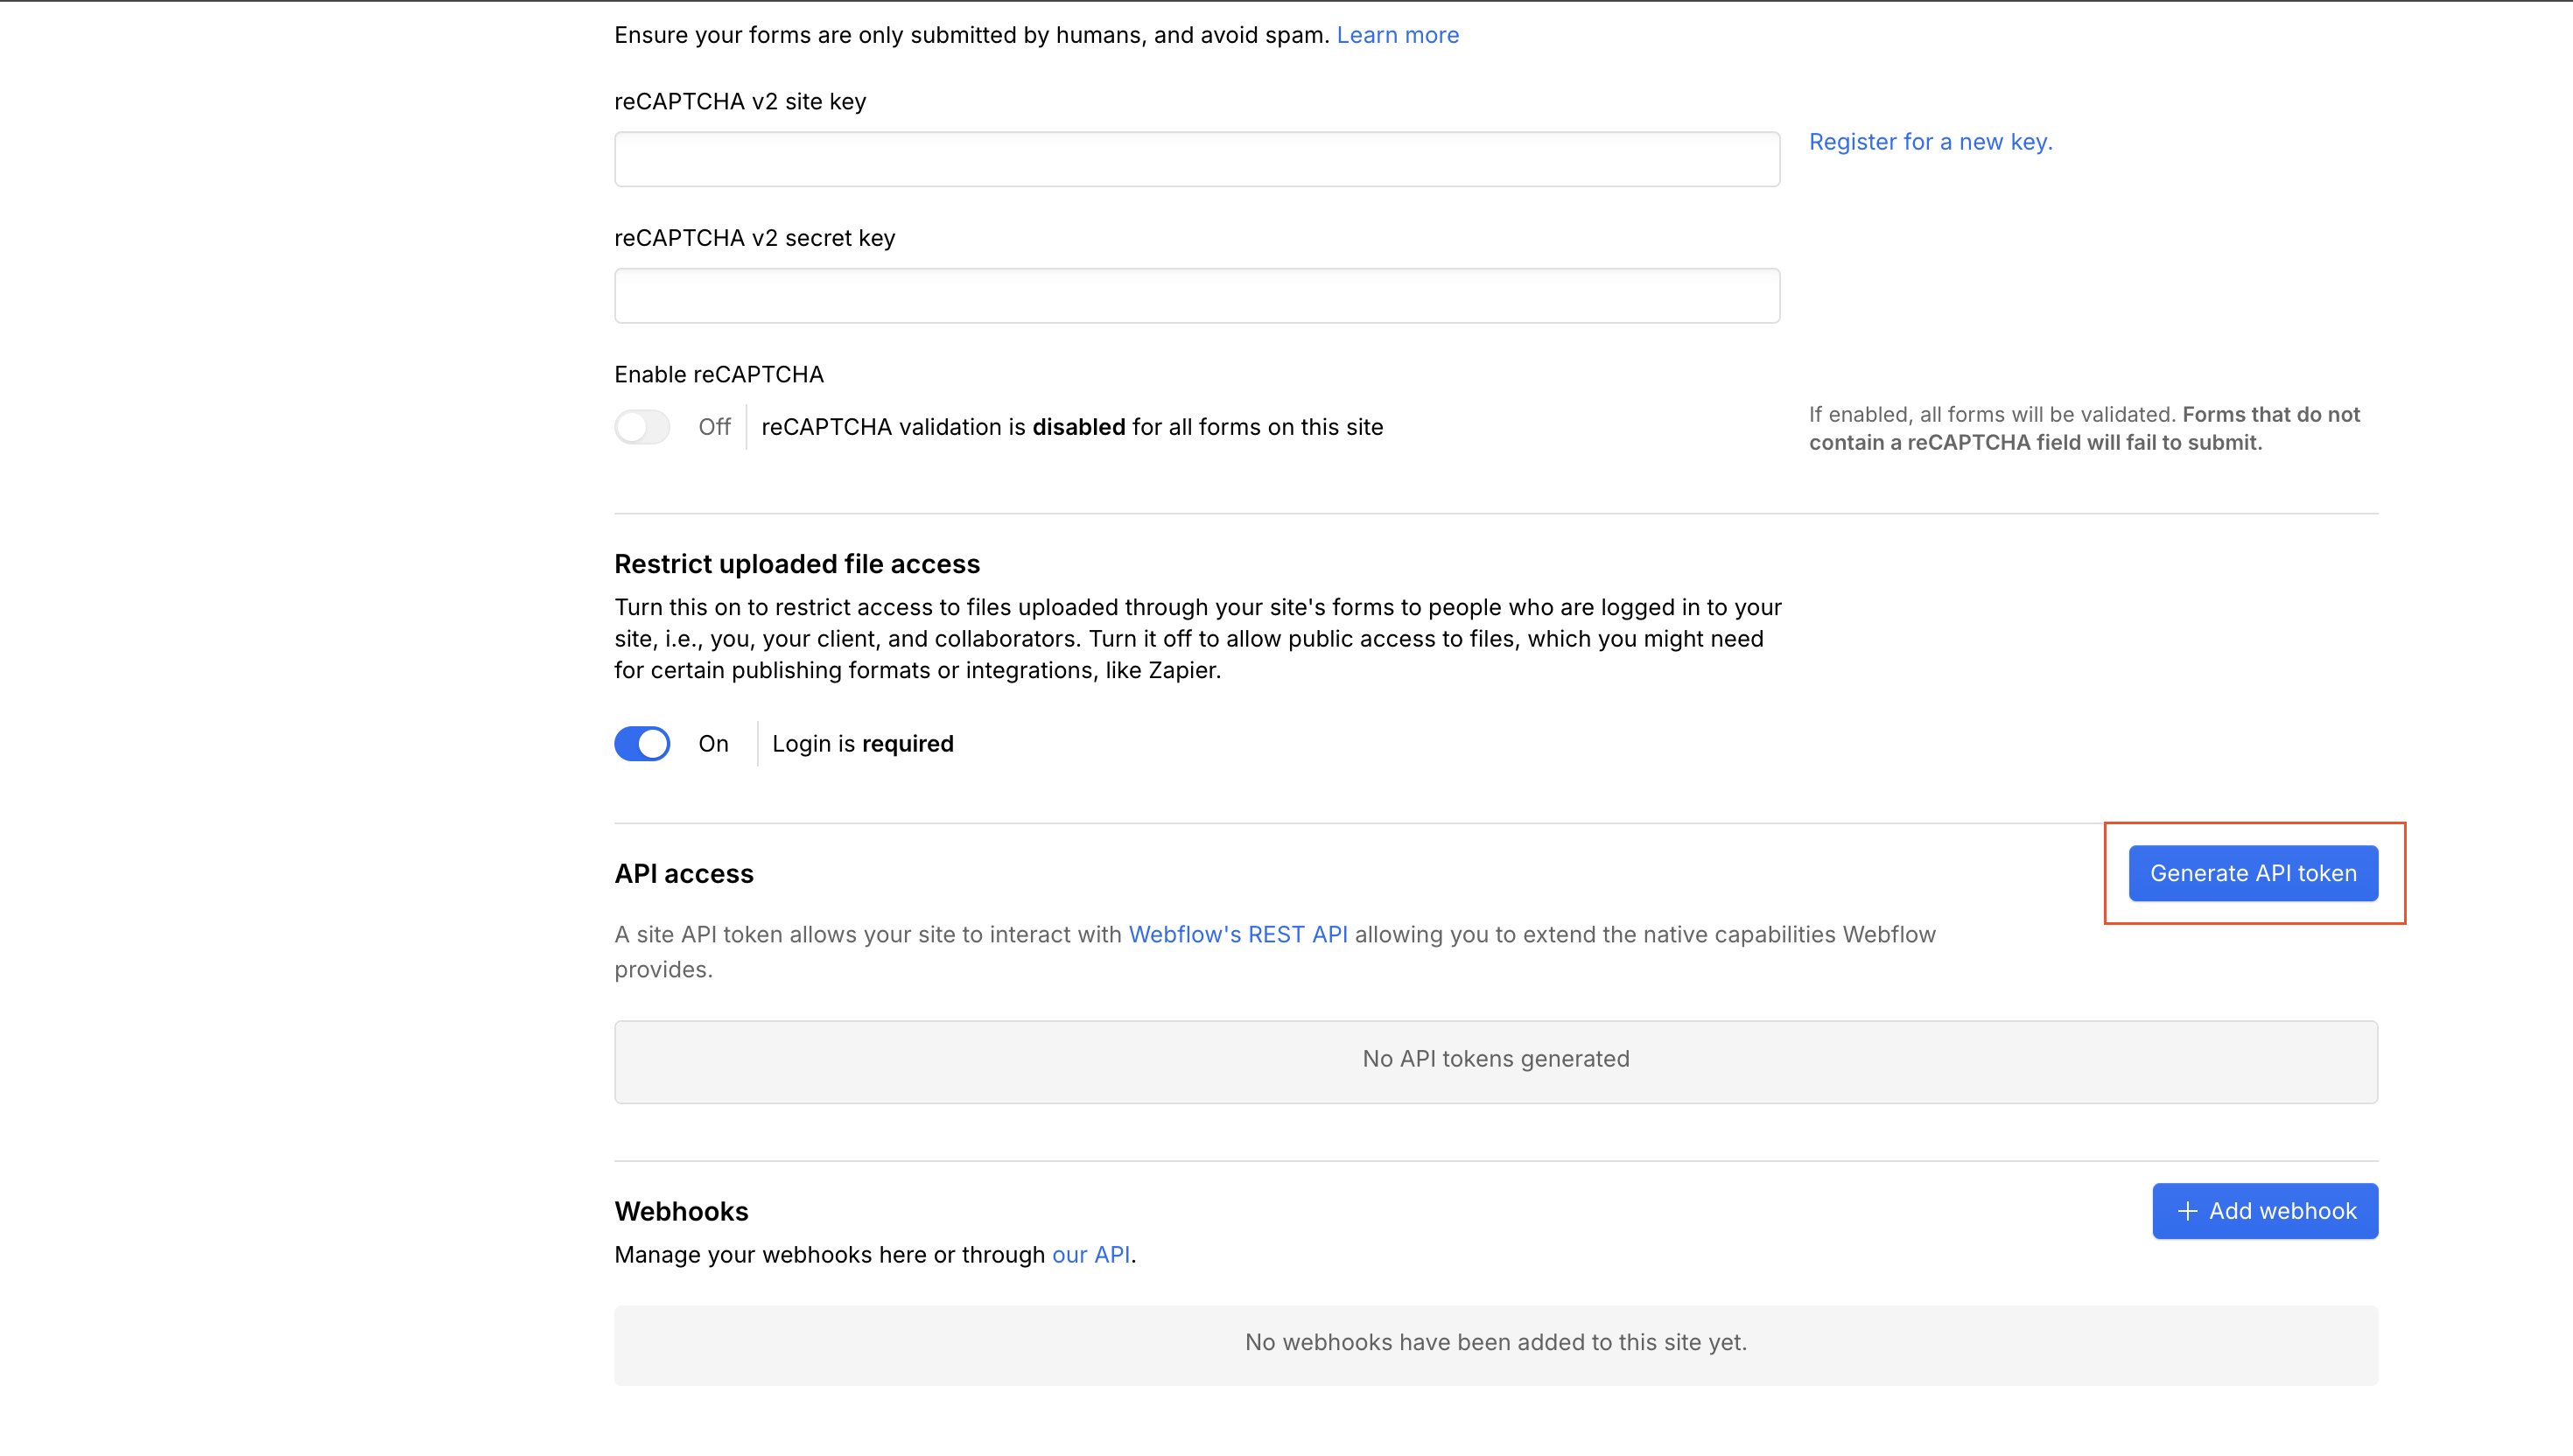
Open Apps & Integrations and scroll to API access
Click Generate API Token
- Name it anything — e.g. "Blog Sync"
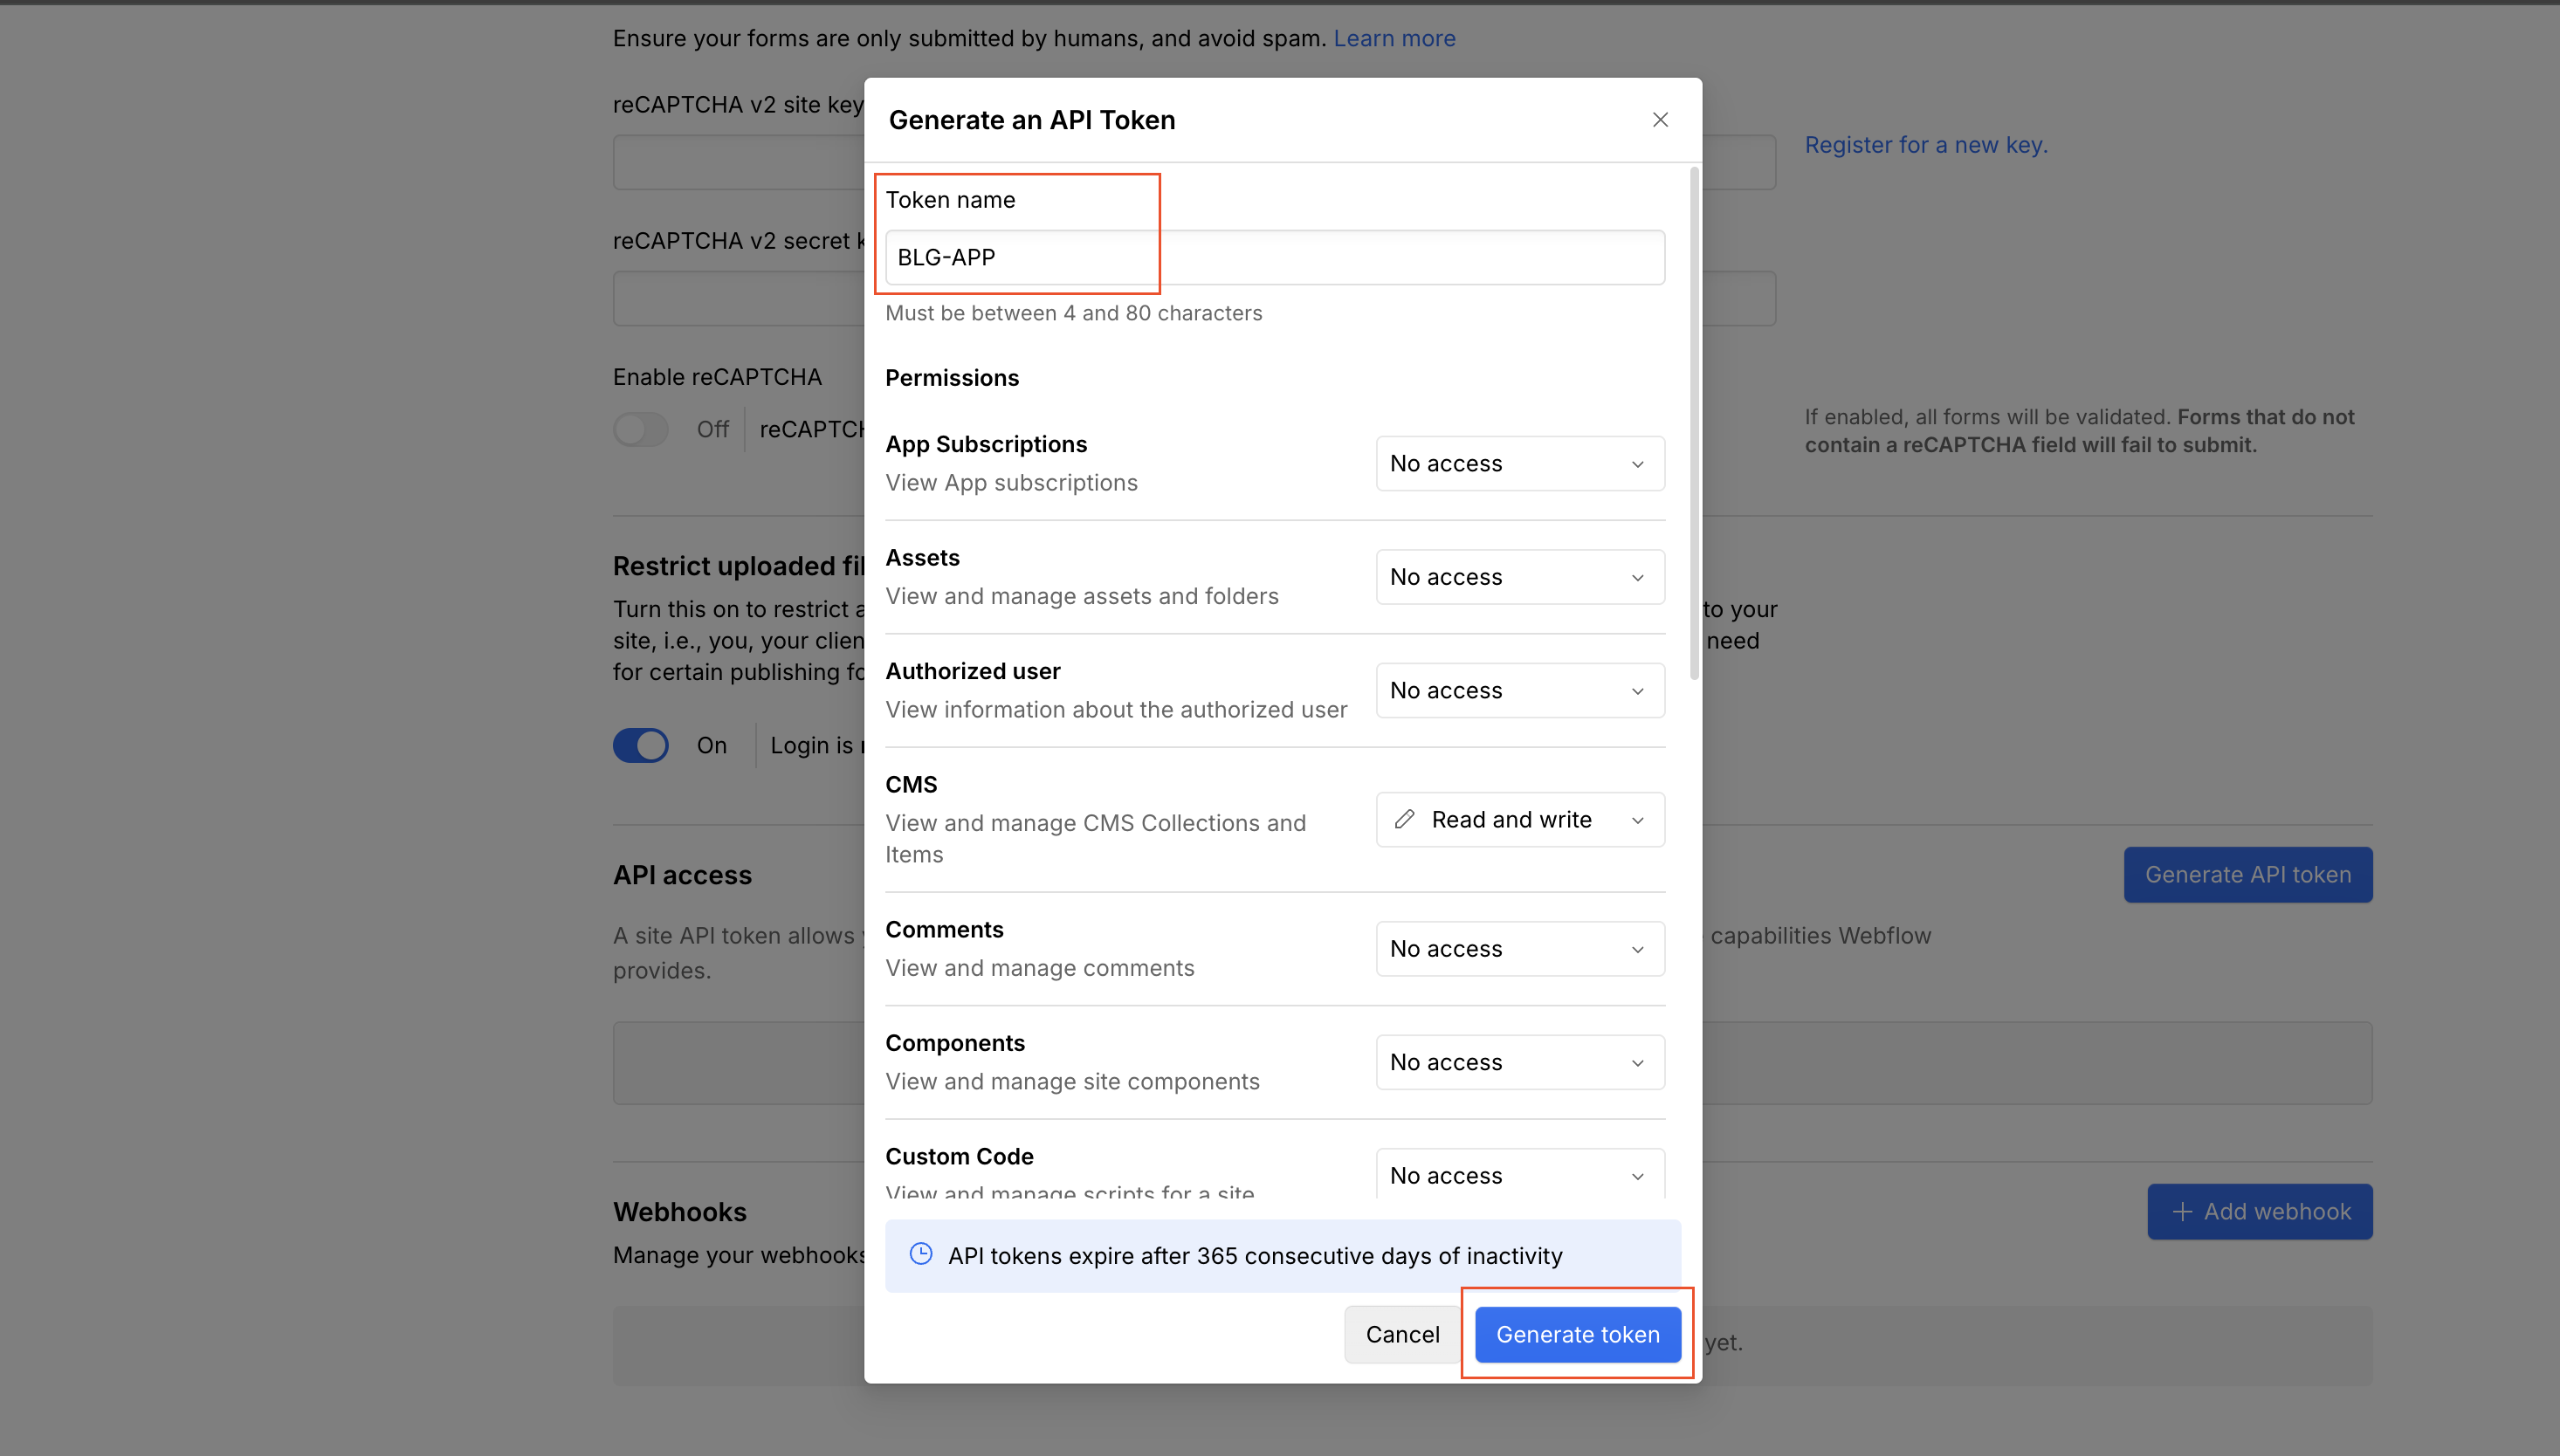
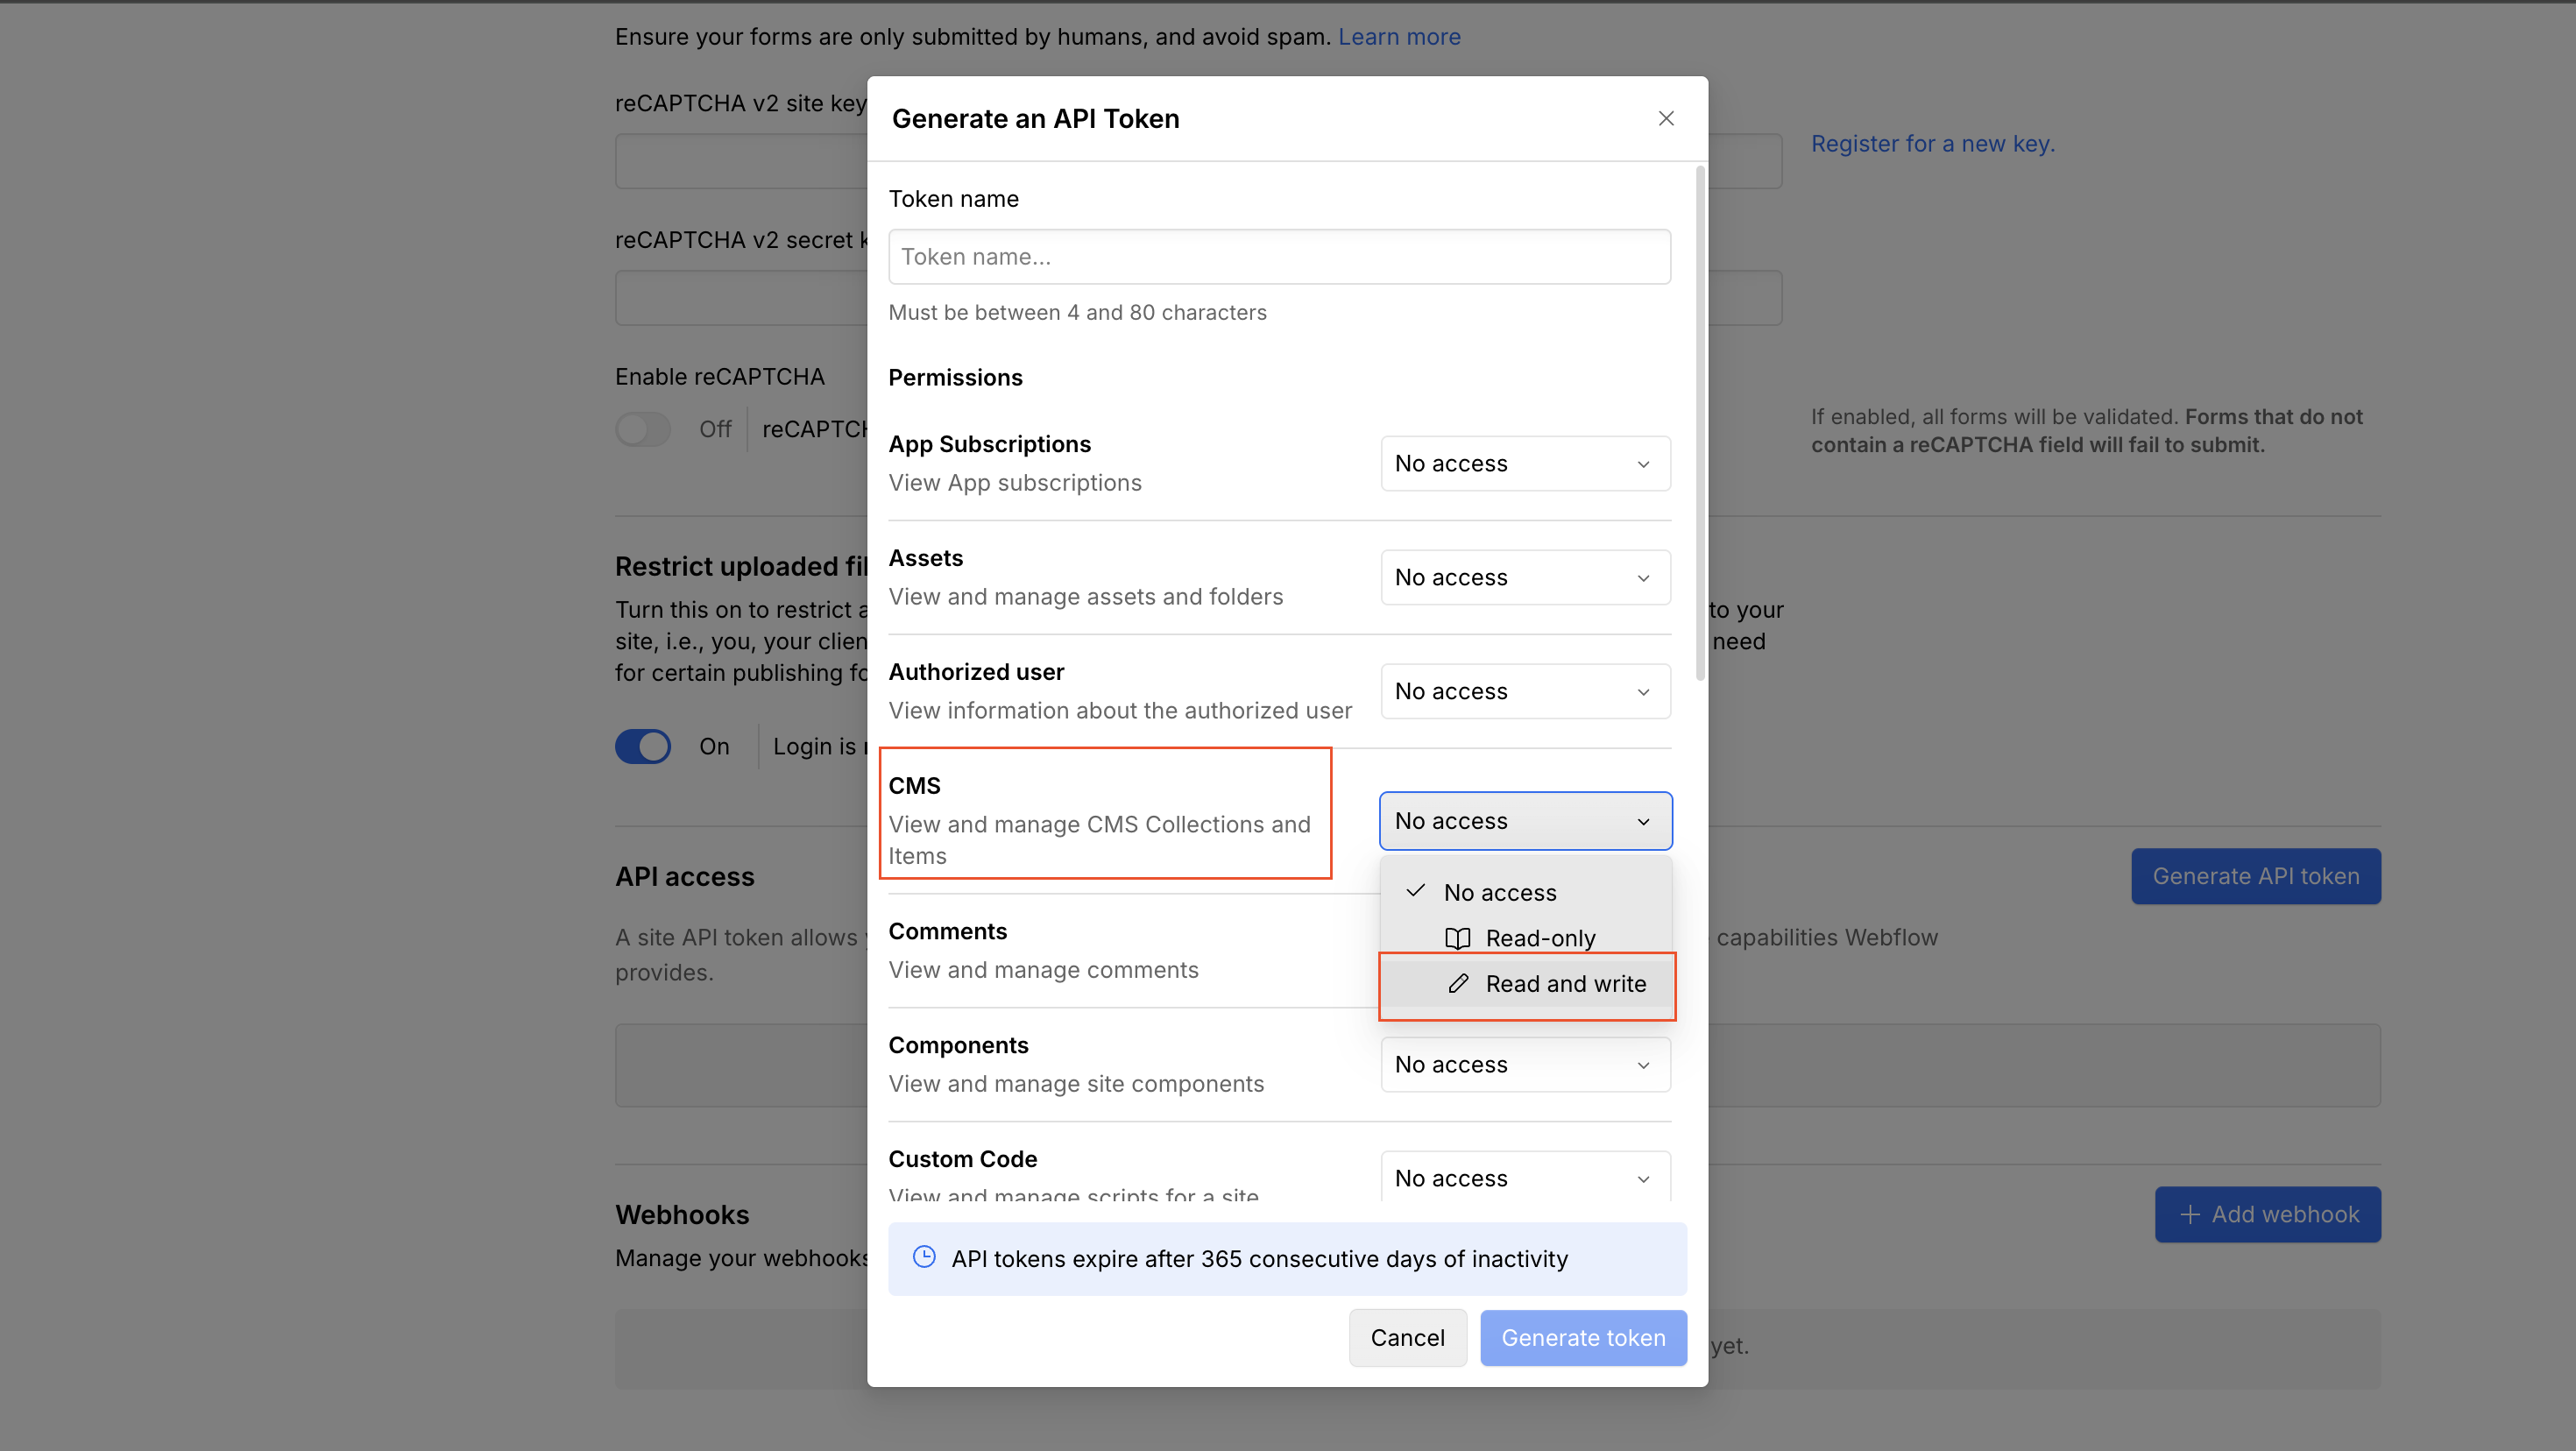
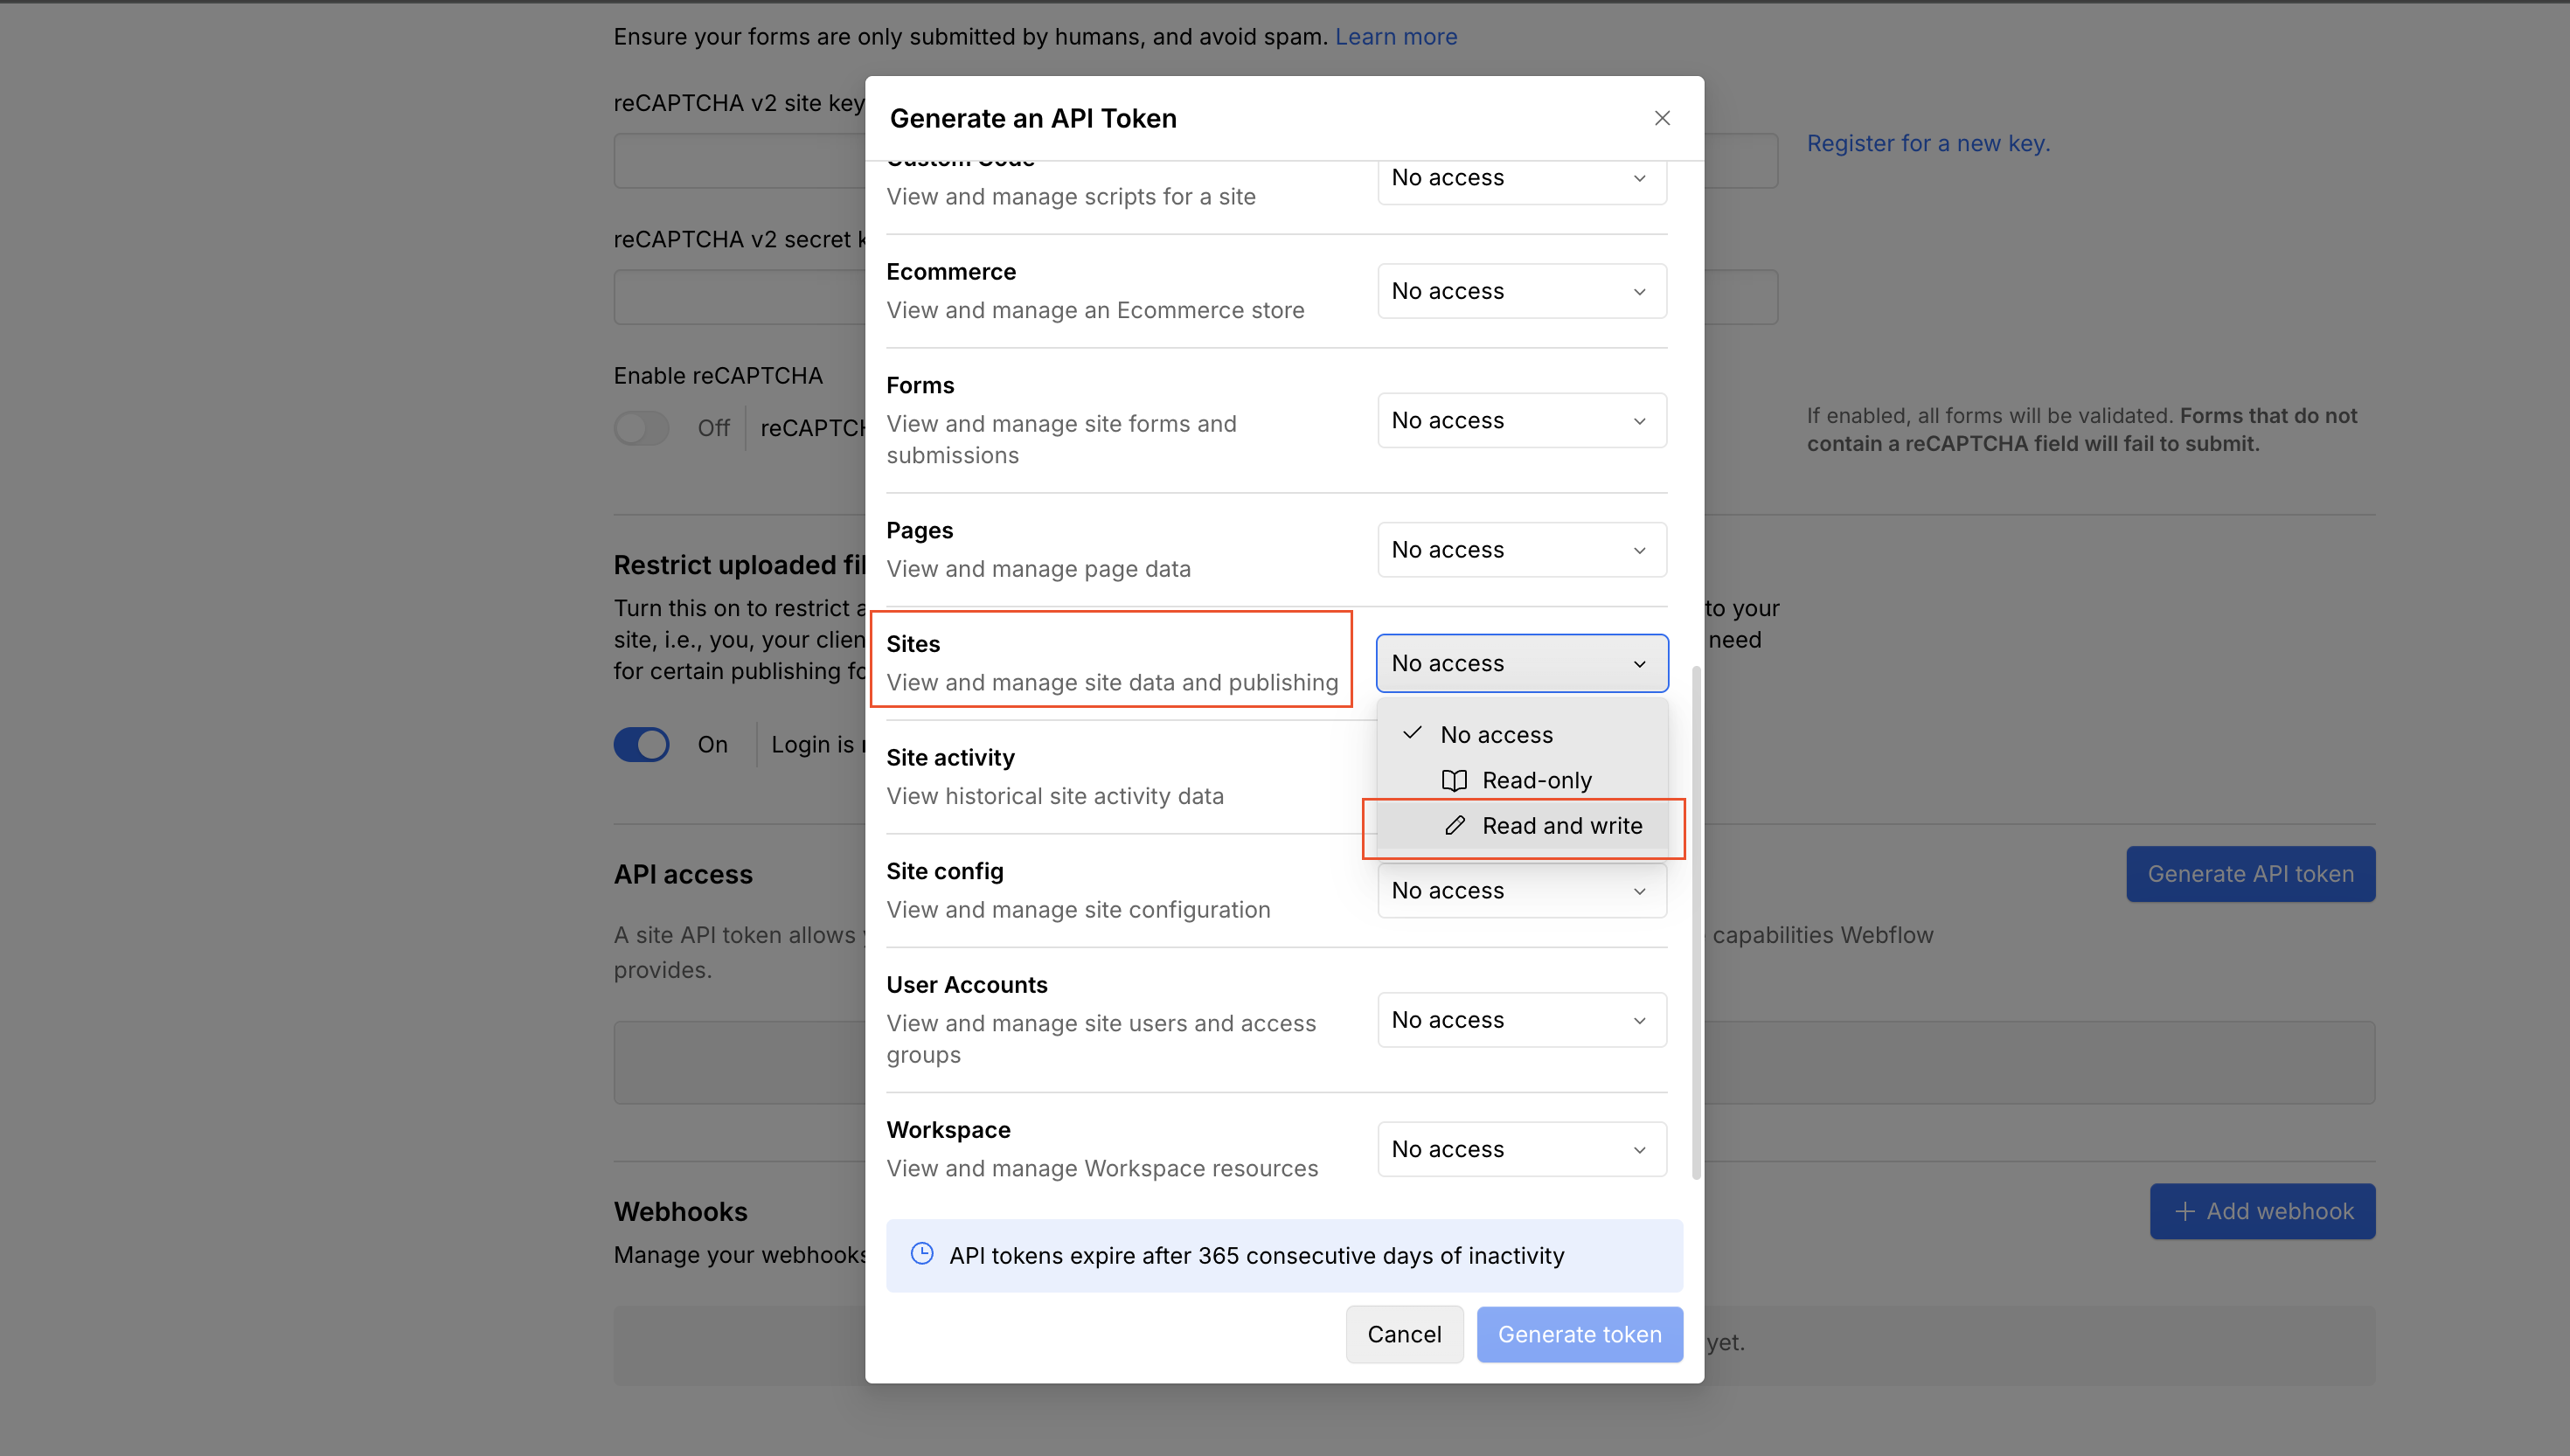
Step 3: Set token permissionsv
Enable exactly these two permissions on the token:
CMS: Read & Write
Sites: Read Only
Step 4: Generate & copy your tokenv
Click Generate token, copy it, then paste it into the API Token field in the wizard. Your Webflow site and collection load automatically.
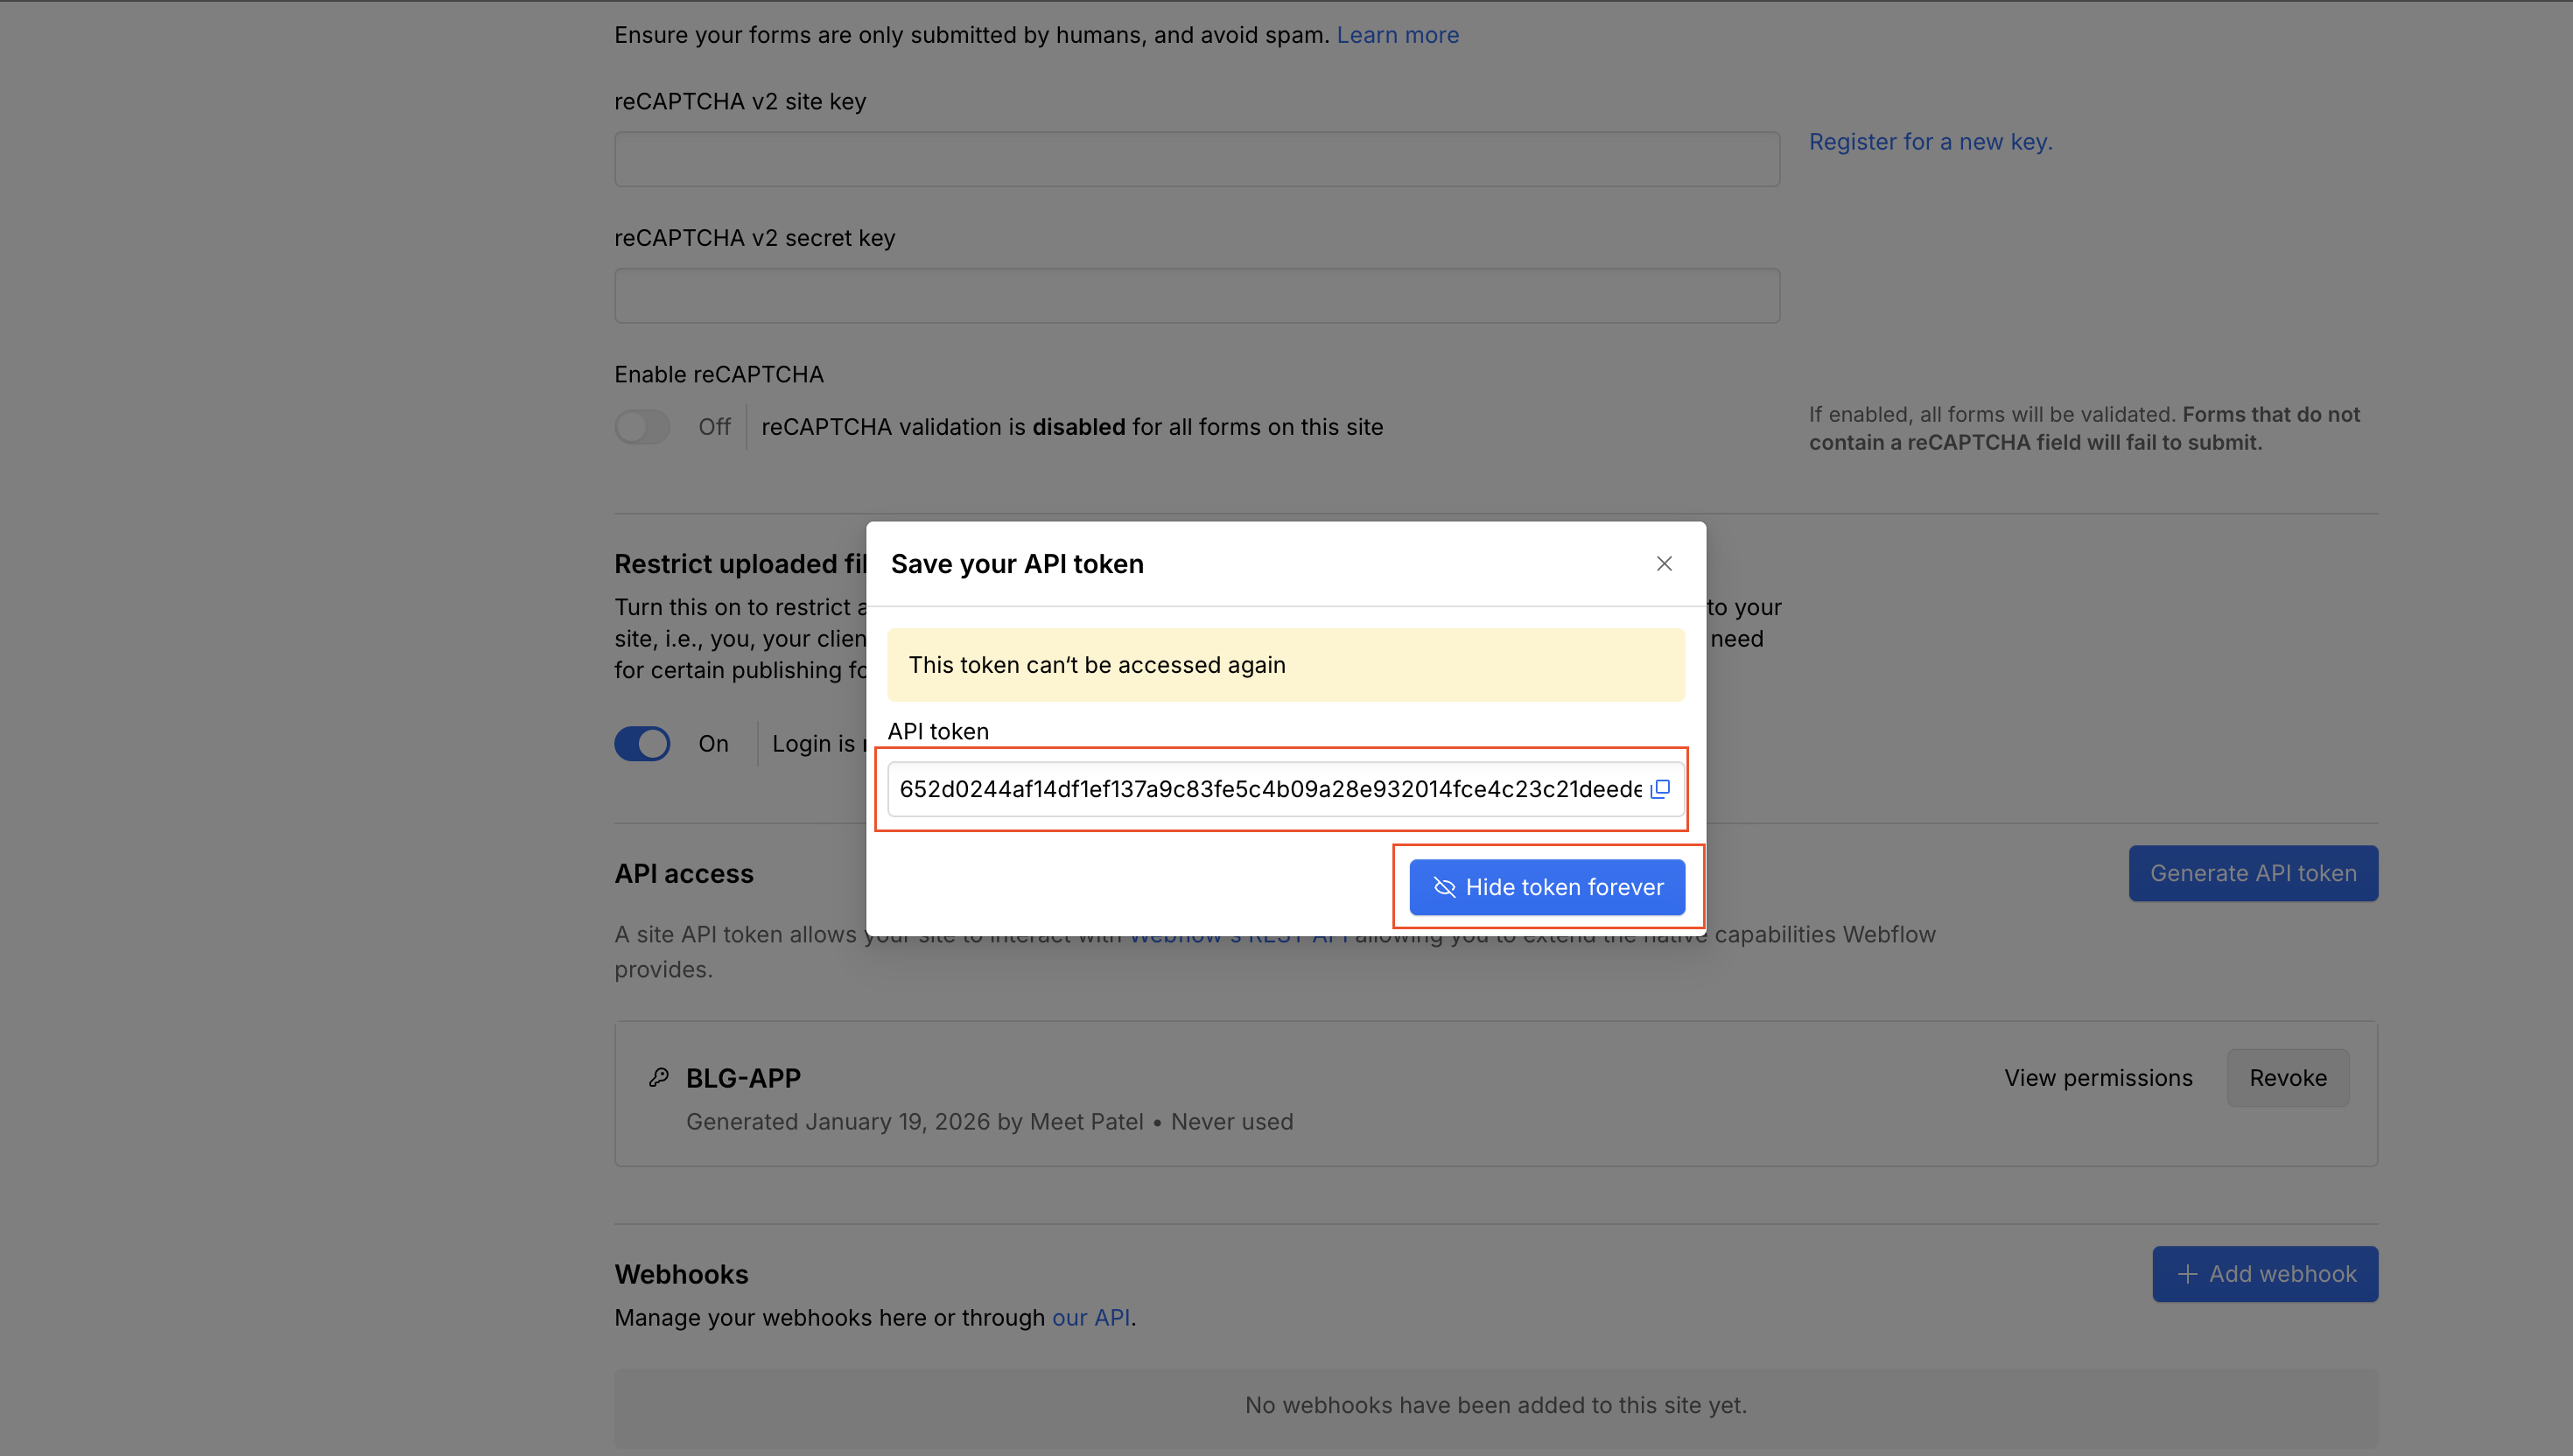
Important: Webflow only shows this token once. Copy it before leaving the page.
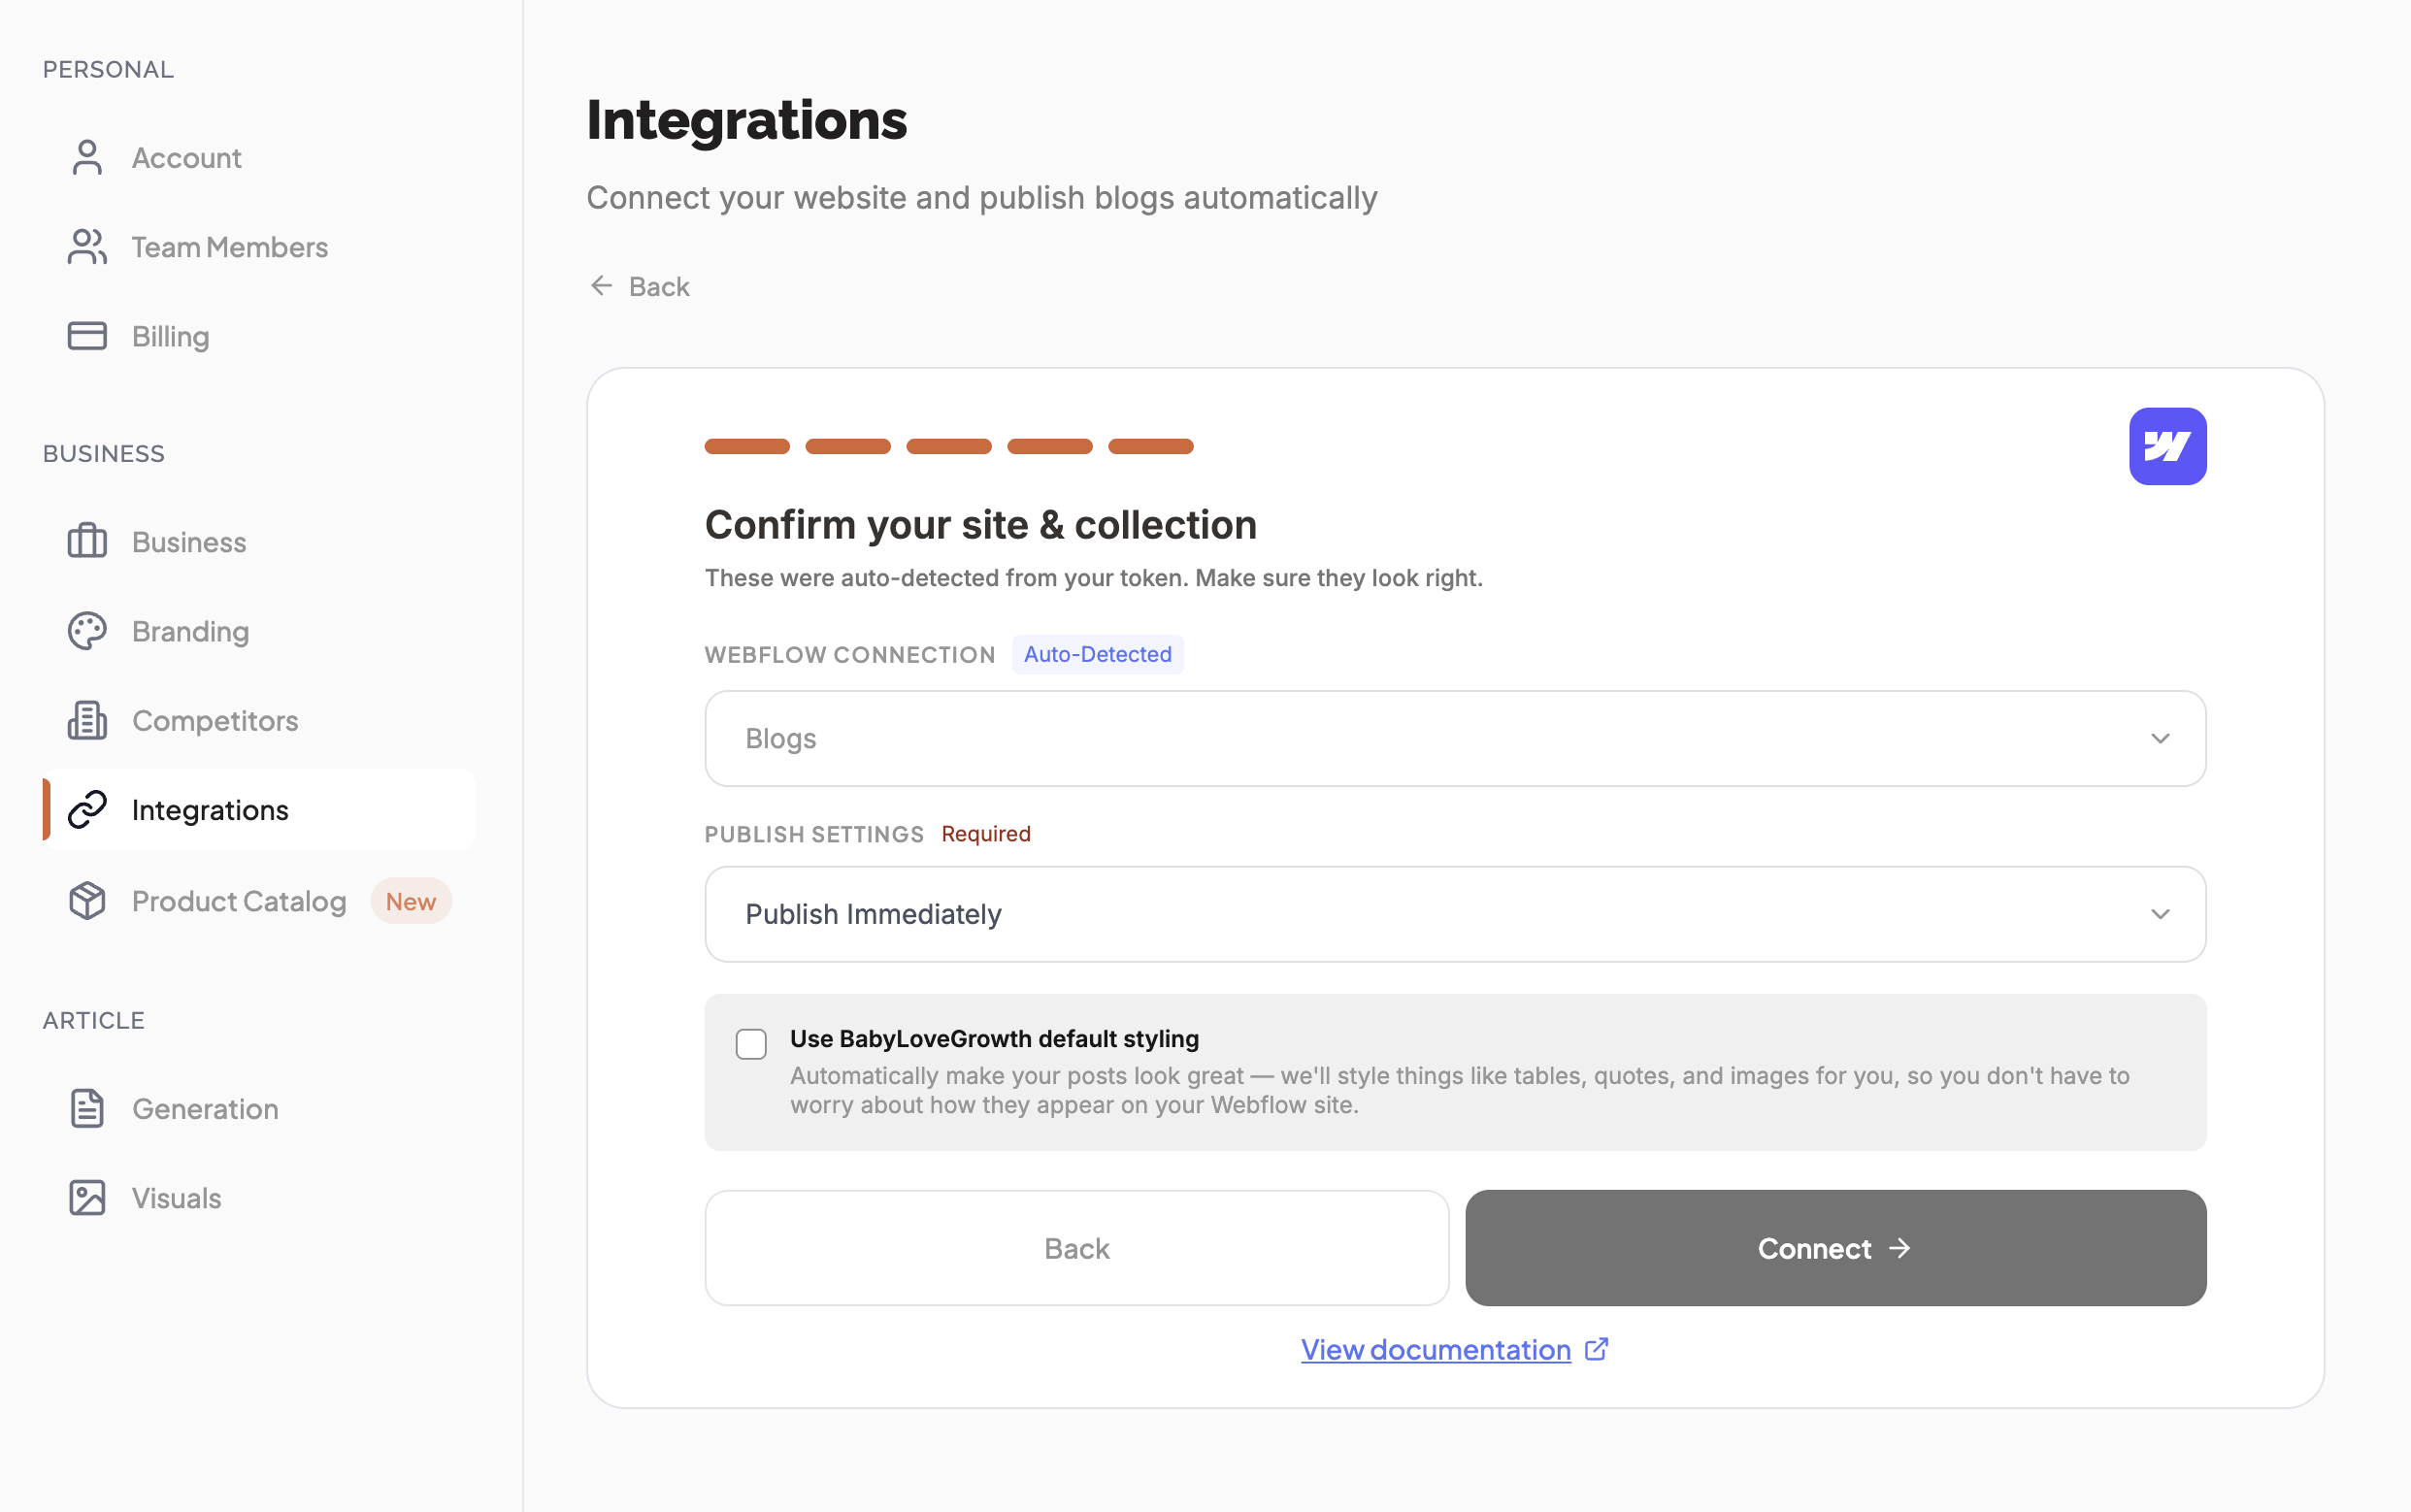
Step 5: Confirm your site & collectionv
The wizard auto-detects your site and collection from the token. Confirm they look right, then choose your Publish Settings:
Webflow Site — the site articles publish to (auto-detected)
Webflow Connection — the CMS collection your blog posts go into
Publish Immediately — articles go live the moment they're generated
Save as Draft — articles are saved as drafts for you to review first
Click Connect to finish. You'll see the Webflow connected! screen.
Publishing & Verifyingv
With Automatically Publish on (toggle at the top of the Integrations page), new articles publish to Webflow on their own. To verify the connection right away:
Go to your Content Plan
- Publish or re-publish any article
In Webflow, open your site → CMS → your blog collection
- You'll see the article appear there
Troubleshooting & FAQv
Blog content not displaying in the Webflow Editor?
This is a known issue from Webflow. Blog content may not display correctly in the Webflow Editor (visible code, broken layout, Rich Text field issues). You can refer to
this confirmation from Webflow
. Content publishes successfully and will be visible on your live website.
Site or collection not showing after pasting the token?
Re-paste the API token in the wizard and make sure it has CMS Read & Write and Sites Read Only permissions.
Publish fails?
Confirm the token is valid and the collection still exists. Check that you haven't hit item-count or field limits in Webflow.
What happens if I regenerate my API token?
The old token stops working immediately. Open Manage on the Webflow card and paste the new token.
Can I publish to multiple Webflow sites?
You can connect one Webflow site per BabyLoveGrowth account. Generate a separate token for each site if you manage several.
Will articles go live immediately?
Only if you choose Publish Immediately in Step 5. Choose Save as Draft to review in Webflow before going live.
Do I need a specific Webflow plan?
You need a Webflow plan that includes CMS access and API capabilities (CMS plan or higher).
Need more help?
Contact support via the chat icon in the bottom-right corner.